The Virtual Camera acts as a virtual hardware source that allows you to mirror your scenes in a third-party application, such as Zoom, Google Meet, Discord, or TikTok Studio.
On macOS, the Virtual Camera is a system camera extension. macOS requires you to approve the extension in System Settings before the installation can finish.
Install the Virtual Camera
Section titled “Install the Virtual Camera”- Open Meld Studio.
- Go to Settings → General → Virtual Camera, or open the Outputs panel and select the Virtual Camera install option.
- Click the Install button.
Meld Studio then shows Awaiting Approval and an Approval Required message. The installation stays in this state until you approve the camera extension in System Settings.
Approve the Camera Extension
Section titled “Approve the Camera Extension”- Open System Settings.
- Type
loginin the search field at the top of the sidebar. - Select Login Items & Extensions from the results.
- Scroll down to the Extensions section at the bottom of the page.
- Click the info icon (ⓘ) on the right of the Camera Extensions row. This opens the list of camera extensions.
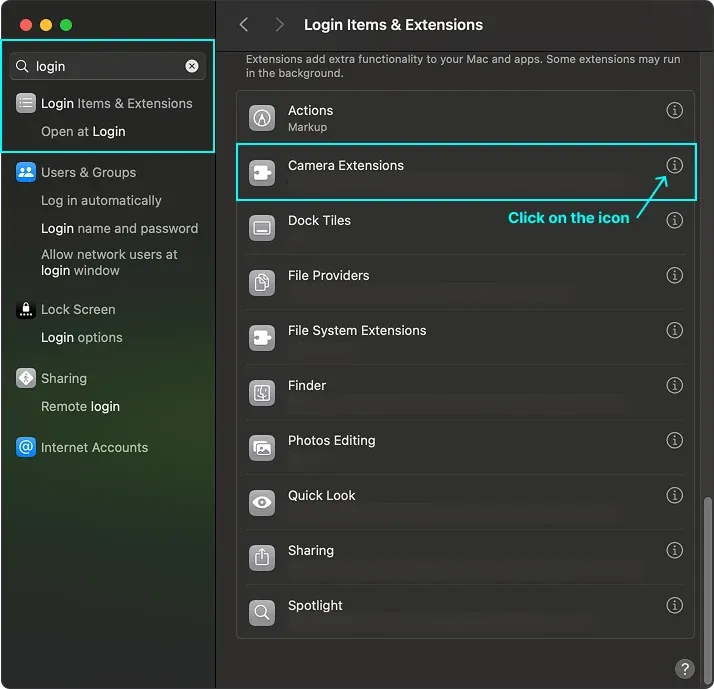
- Turn on the toggle next to Meld Studio.
- Click Done.
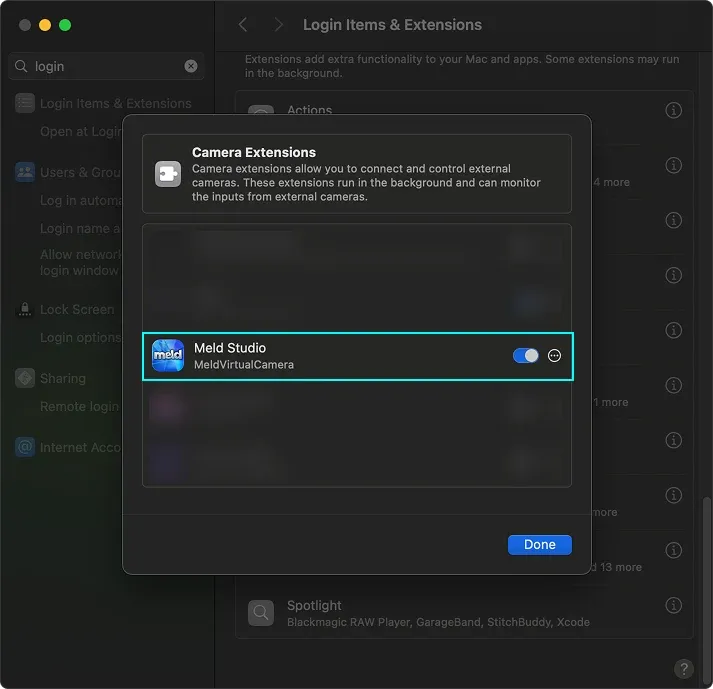
The installation finishes once the extension is approved.
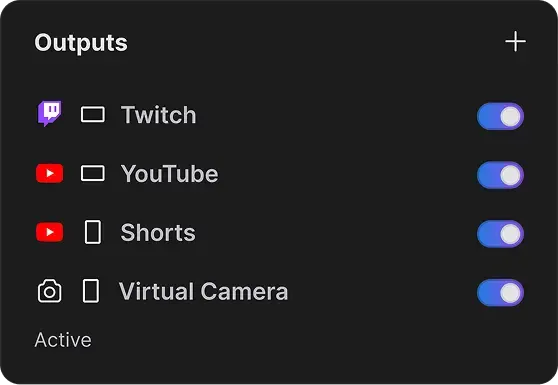
In the Outputs panel, a toggle now replaces the Install button. Turn the Virtual Camera on and off as needed.
Use the Virtual Camera
Section titled “Use the Virtual Camera”- Navigate to the Outputs panel on the right-hand side of Meld Studio.
- Turn on the Virtual Camera by toggling the switch.
- In the third-party application, select Meld Studio as the camera source.
The Virtual Camera is now available for use in third-party applications or on websites.
Virtual Camera Canvas Output
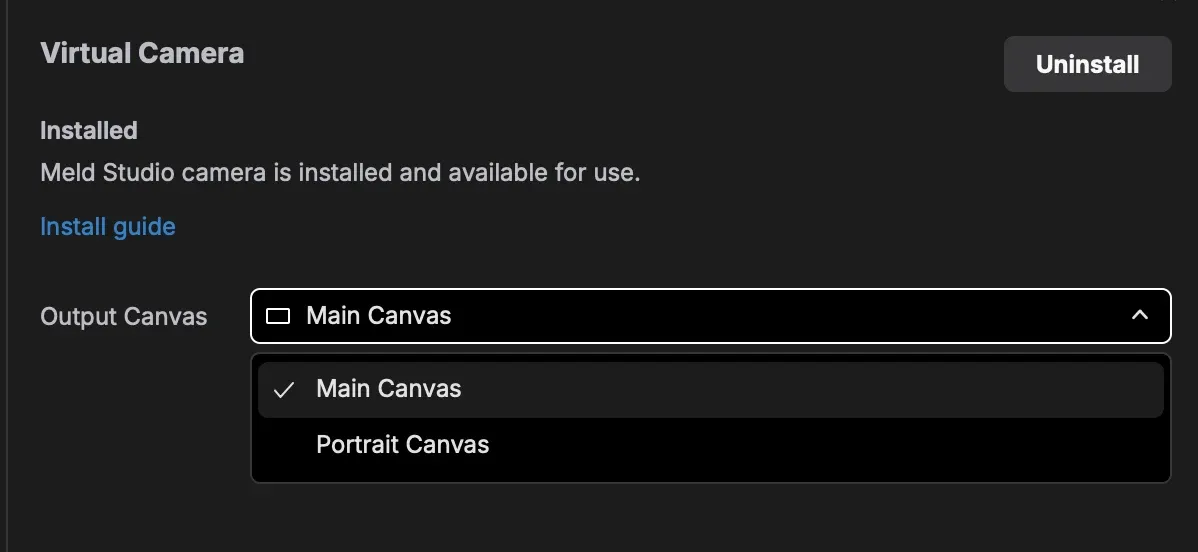
Section titled “Virtual Camera Canvas Output”When Multi Canvas is enabled, choose which canvas (Main or Portrait) is sent through the Virtual Camera. To change the canvas output:
- Navigate to the Virtual Camera tab in Settings.
- Expand the Output Canvas dropdown.
- Select either Main Canvas or Portrait Canvas.
Common Use Cases
Section titled “Common Use Cases”- Video Conferencing: Use Meld Studio's scenes and effects in Zoom, Google Meet, Microsoft Teams, or Discord
- TikTok Studio: Go live on TikTok from your computer with Meld Studio as the camera source
- Streaming Software: Send Meld Studio output to other streaming applications
- Recording Software: Capture Meld Studio scenes in external recording applications
- Virtual Events: Professional presentations with overlays, lower thirds, and branded content
Troubleshooting
Section titled “Troubleshooting”Meld Studio stays on Awaiting Approval
Section titled “Meld Studio stays on Awaiting Approval”The camera extension has not been approved yet. Follow the steps in Approve the Camera Extension. Meld Studio finishes the installation as soon as the extension is enabled.
Meld Studio does not appear as a camera
Section titled “Meld Studio does not appear as a camera”- Confirm the Meld Studio toggle is on in System Settings → General → Login Items & Extensions → Camera Extensions.
- Confirm the Virtual Camera is turned on in the Outputs panel.
- Quit and reopen the third-party application. Most applications only check for new camera sources at launch.