The Layers panel is on the left side of the viewport. It's where you can create and manage your layers.
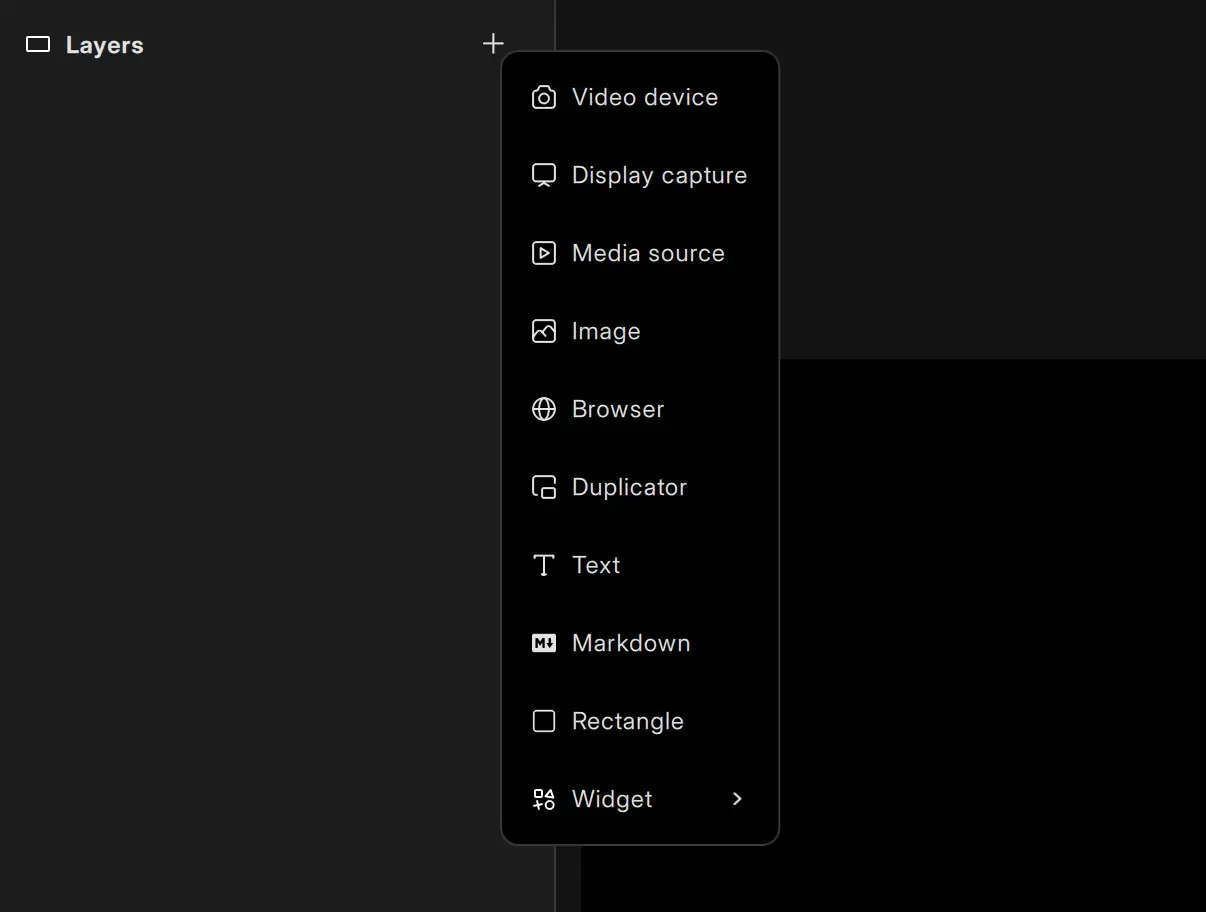
Discover the various types of layers that you can create in Meld Studio.
Video Device
Section titled “Video Device”A Video device is the hardware or virtual input source that provides a video feed for your live stream and recordings. This layer can be a webcam, capture card, or virtual camera.
Add A Video Device
Section titled “Add A Video Device”- Navigate to the Layers panel.
- Click the ╋ icon to add a new layer.
- Select Video device from the list.
- Select a device for your layer using the dropdown on the canvas or in the Inspector panel.
Video Device Settings
Section titled “Video Device Settings”Meld Studio allows configuration of video devices through global settings for resolution and framerate (FPS) and advanced camera settings for supported devices on Windows.
To adjust the video device settings:
- Select your Video device layer.
- Navigate to the inspector panel.
- Open the Video device settings dialog by clicking the settings icon.
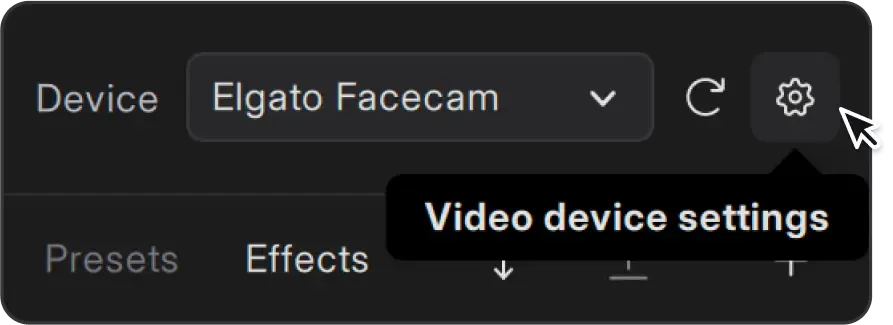
Configure the following options:
- Resolution: Set the output resolution for the camera (1080p, 720p, etc)
- Framerate (FPS): Choose the desired framerate (0 FPS, 60 FPS)
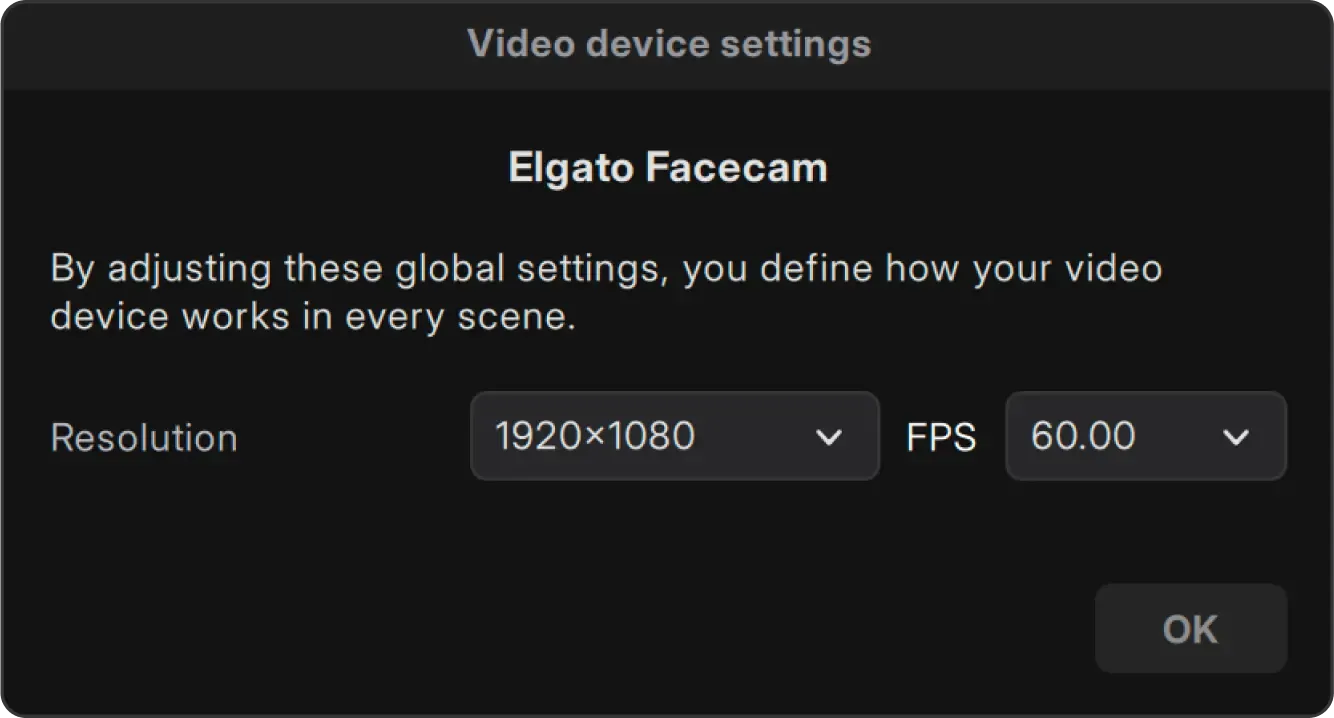
Global settings affect all instances of the camera across scenes.
Use Alternate Capture Backend
Section titled “Use Alternate Capture Backend”Enables compatibility with older capture devices.
When enabled, forces the device to use the Windows DirectShow API instead of the default Media Foundation backend (if supported).
Camera Properties
Section titled “Camera Properties”Displays the system’s native configuration window for the camera.
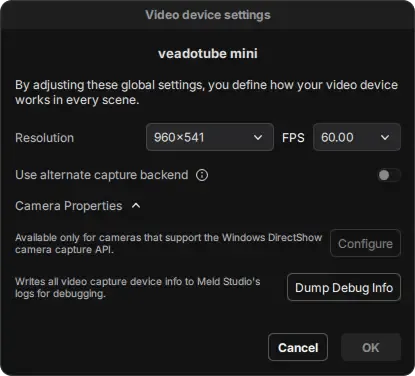
Dump Debug Info
Section titled “Dump Debug Info”Writes technical details about the connected camera into Meld Studio’s log files. Use this when troubleshooting device compatibility or reporting bugs to support.
Video Device Quick-Actions
Section titled “Video Device Quick-Actions”When a video device layer (such as a webcam or capture card) is selected, a quick-actions toolbar appears at the top of the layer’s bounding box. This toolbar provides fast access to common presets for cropping video sources.
Toolbar Options From left to right:
- Crop – Enables manual cropping using handles around the layer.
- Square Shape with rounded corners.
- Circle shape.
- Vertical crop.
- Reset Crop – Restores the original uncropped dimensions of the layer.
Advanced Camera Settings
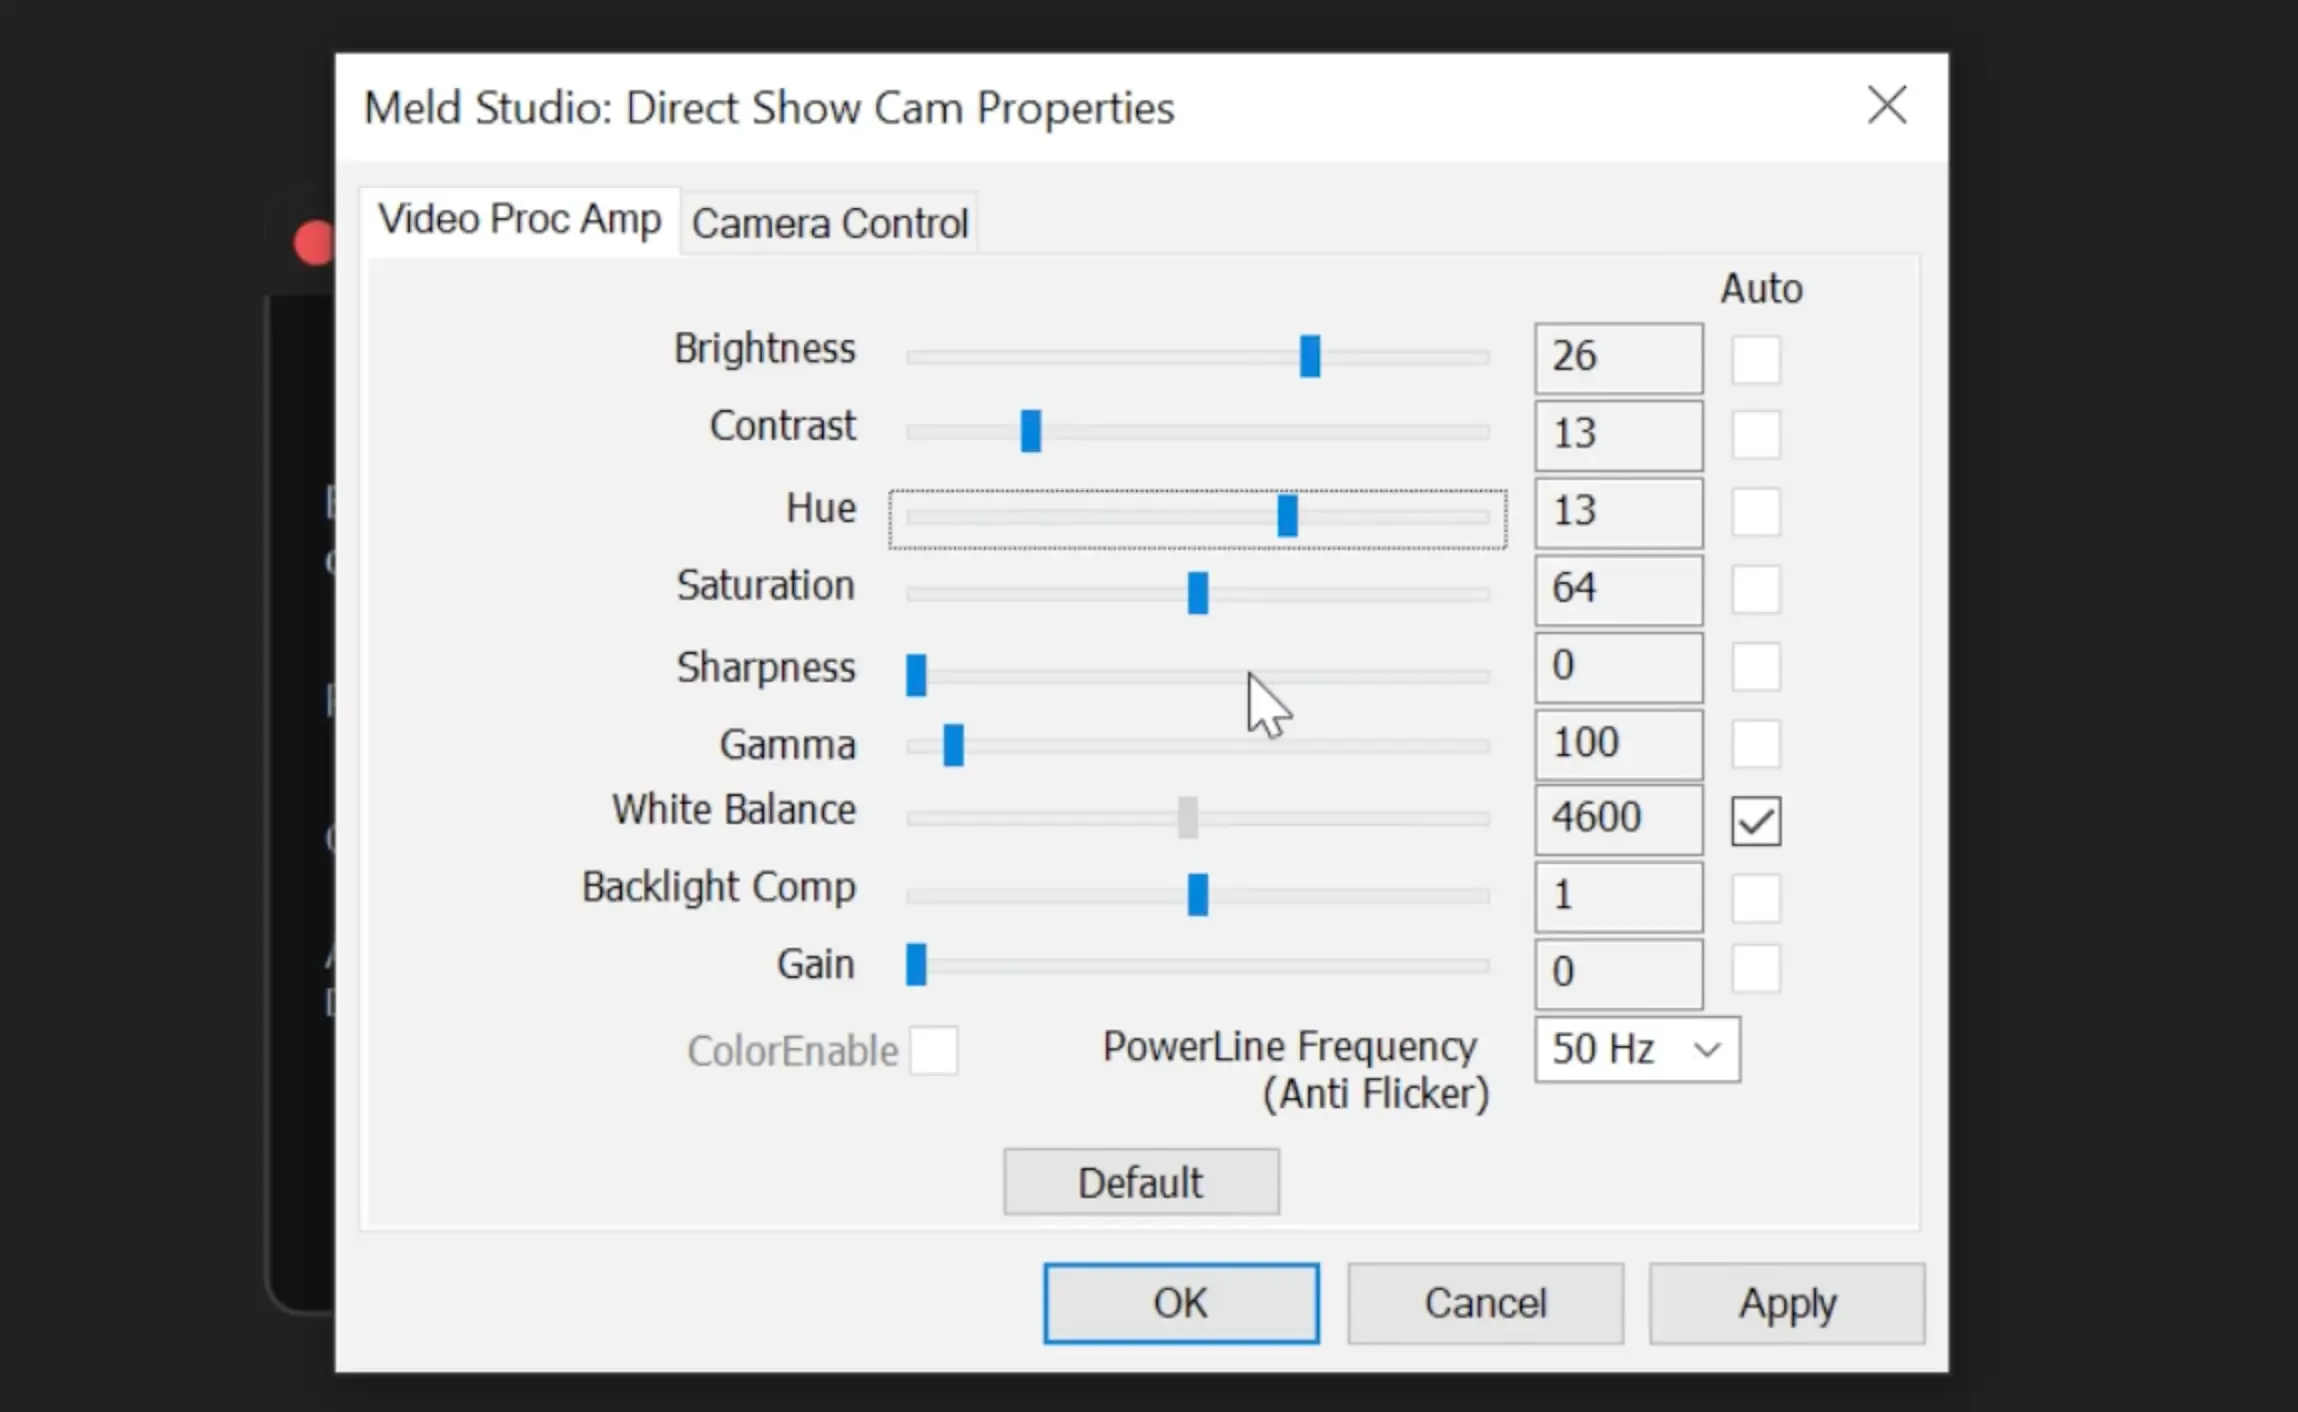
Section titled “Advanced Camera Settings”For Windows users, advanced camera settings are available for cameras that support the Windows DirectShow video capture API. These settings provide access to the native camera properties dialog, enabling further customization based on your camera model.
How To Access Advanced Camera Settings
Section titled “How To Access Advanced Camera Settings”- In the Video device settings dialog, locate the Camera Properties section.
- Expand the Camera Properties section and click Configure to open the native camera properties dialog.
Display Capture
Section titled “Display Capture”A Display Capture lets you capture content on your screen, such as an application window or entire desktops.
Add A Display Capture
Section titled “Add A Display Capture”- Navigate to the Layers panel.
- Click the ╋ icon to add a new layer.
- Select Display capture from the list.
- Select a source for your layer using the dropdown on the canvas or in the Inspector panel.
Audio Track
Section titled “Audio Track”Once you've added the Display capture layer and source, you can add an audio track associated with the layer in the Audio Mixer.
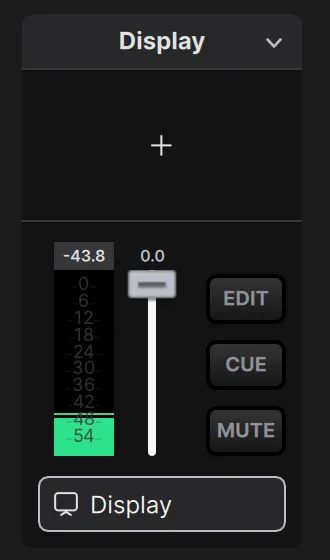
- Select the Display capture layer.
- Navigate to the Inspector panel.
- Enable the Add an audio track for the source option under the dropdown menu.
- Toggle CUE on to monitor audio from the audio track.
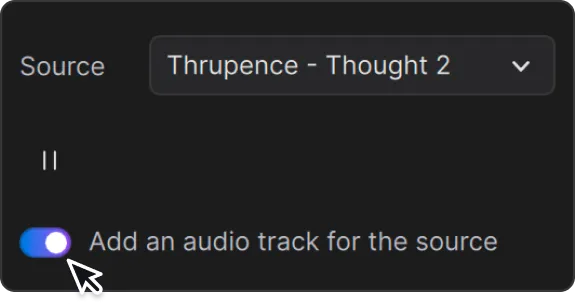
Delete the audio track from the Audio Mixer using the Audio Track dropdown menu.
Capture Devices Stats (FPS Graphs)
Section titled “Capture Devices Stats (FPS Graphs)”By selecting View -> Open Capture Device Stats, you can open the Capture Device Stats popup, which displays FPS graphs for all capture devices (Video device and Display capture layers) across all your scenes.
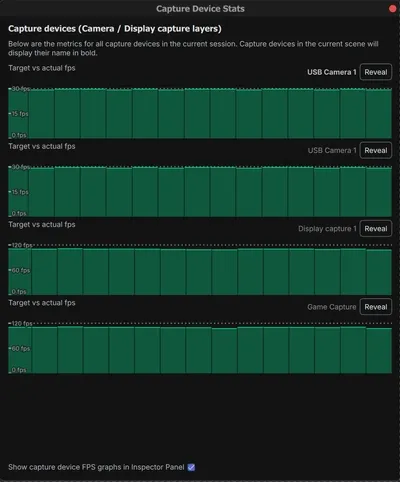
By toggling on the Show capture device FPS graphs in Inspector Panel option at the bottom of the popup (disabled by default), Meld Studio will display the FPS Graph for a layer in the Inspector Panel.
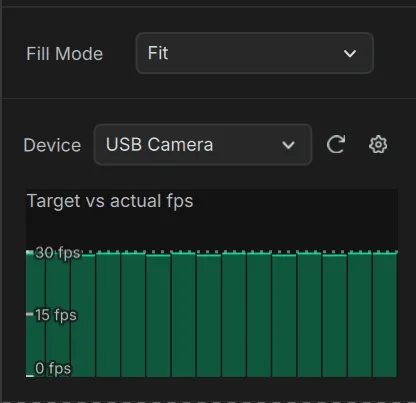
The FPS Graphs are provided to assist in debugging any FPS-related issues you may encounter. If certain sources appear to be visually lagging, but the top-level render FPS is as expected, checking the Capture Device Stats view is a good first step. This allows you to determine if any of your video or display capture layers are producing fewer frames than requested, helping to identify the source of the issue.
Common Causes Of Capture Device Lag
Section titled “Common Causes Of Capture Device Lag”- Faulty connection for external camera device.
- Camera is in low-light compensation mode.
- Your system is CPU or GPU bottlenecked (possibly due to playing an intensive game) causing the camera to produce frames too slowly. This can often be compounded if your Camera has an external AI filter applied to it.
Media Source
Section titled “Media Source”A Media source lets you add a media file to your scene for playback.
Add A Media Source
Section titled “Add A Media Source”- Navigate to the Layers panel.
- Click the ╋ icon to add a new layer.
- Select Media source from the list.
- Search for and select the media file you want to import into Meld.
Drag & Drop
Section titled “Drag & Drop”Drag and drop the media file from your directory directly onto the Meld Studio canvas.
Audio Track
Section titled “Audio Track”When you add a Media source and import the media file, Meld automatically creates an audio track associated with the layer.
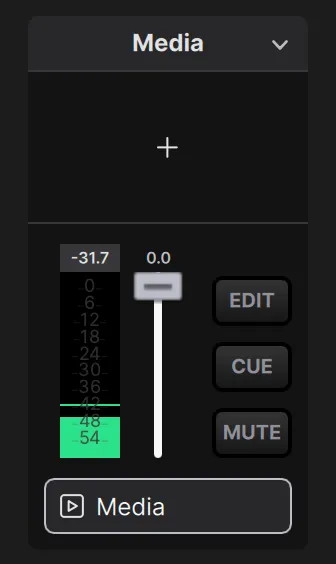
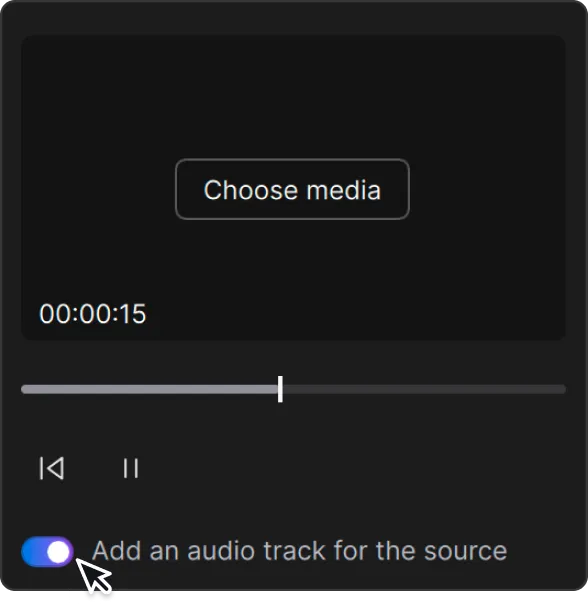
Delete the audio track from the audio mixer anytime. If you delete the audio track, add it back by following these steps:
- Select the Media source layer.
- Navigate to the Inspector panel.
- Enable the Add an audio track for the source under the media controls.
- Toggle CUE on to monitor audio from the audio track.
With the Image layer, you can add graphics to your scenes, such as logos, backgrounds, overlays, and other visual elements.
Add An Image layer
Section titled “Add An Image layer”- Navigate to the Layers panel.
- Click the ╋ icon to add a new layer.
- Select Image from the list.
- Search for and select the image file you want to import into Meld.
Drag & Drop
Section titled “Drag & Drop”Drag and drop the image file from your directory directly onto the Meld Studio canvas.
Browser
Section titled “Browser”A Browser source provides the option to add a URL as a source. The URL can display stream overlays, alerts, widgets, media, and more.
Add A Browser
Section titled “Add A Browser”- Navigate to the Layers panel.
- Click the ╋ icon to add a new layer.
- Select Browser from the list.
- Add the URL to the field in the Inspector panel.
- Use the reload icon to refresh the Browser URL whenever needed.
Copy & Paste A Browser URL
Section titled “Copy & Paste A Browser URL”Quickly create a Browser layer by copying and pasting a URL directly onto the canvas.
- Copy the desired URL from your browser or another source.
- Go to Meld Studio and paste the URL onto the canvas.
A new Browser layer will be automatically created with the pasted URL.
Drag & Drop HTML Files
Section titled “Drag & Drop HTML Files”Easily create a Browser layer by dragging and dropping an HTML file onto the canvas.
- Locate the HTML file on your computer.
- Drag the file and drop it directly onto the Meld Studio canvas.
A Browser layer will be created, displaying the content of the HTML file.
Browser Audio Track
Section titled “Browser Audio Track”Once you've added the Browser layer, you can add an audio track associated with the layer in the Audio Mixer.
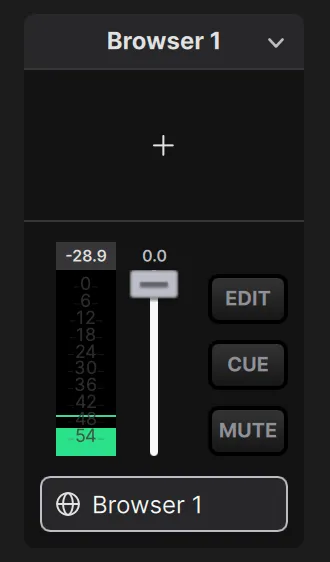
Browser audio track
- Select the Browser layer.
- Navigate to the Inspector panel.
- Enable the Add an audio track for the source option under the URL text field to create an audio track associated with the layer.
- Toggle CUE on to monitor audio from the audio track.
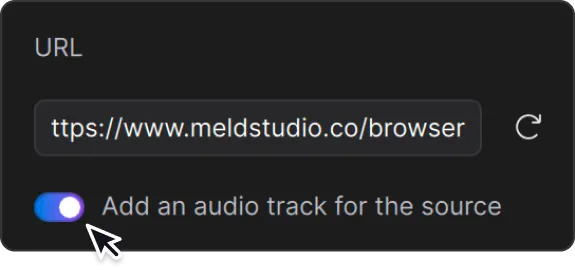
Delete the audio track from the audio mixer anytime.
Lock Size
Section titled “Lock Size”The Lock Size feature prevents the current browser layer size from resizing along with the layer itself. This is particularly useful for web pages that may display incorrectly or distort when resized to fit different layer dimensions. Enable this option to maintain the original browser size regardless of adjustments to the layer.
Duplicator
Section titled “Duplicator”Nested Scenes And Layers
Section titled “Nested Scenes And Layers”The Duplicator allows you to duplicate an entire scene (nested scenes) or a layer from any selected scene in your session. Unlike regular Copy and Paste, the Duplicator creates an instance of the scene or layer across multiple scenes, and any changes made to the main source are reflected in all other duplicators.
Add A Duplicator
Section titled “Add A Duplicator”- Navigate to the Layers Panel.
- Click the ╋ icon to add a new layer.
- Select Duplicator from the list.
- Select the source scene or layer you want to duplicate.
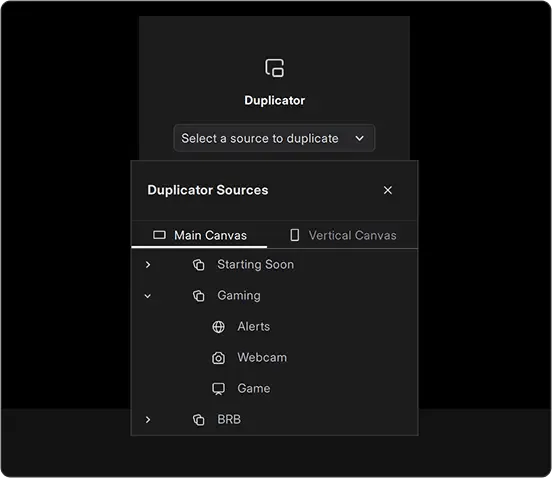
Choosing The Source
Section titled “Choosing The Source”When selecting the source to duplicate, you’ll see all available scenes and layers organized. If Multi Canvas is enabled, you can switch tabs to select sources from a specific canvas.
- Main Canvas: Shows layers from the standard Main canvas.
- Vertical Canvas (if enabled): Displays layers specific to the vertical layout.
Update The Duplicator Source
Section titled “Update The Duplicator Source”- Select the layer.
- Navigate to the Inspector Panel.
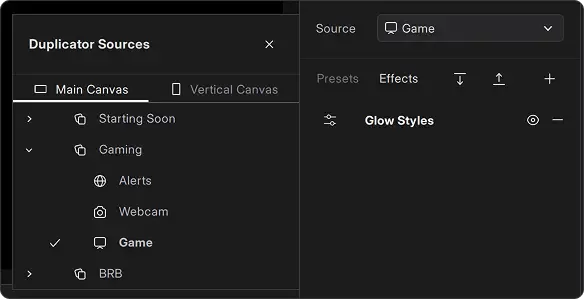
- Use the Source dropdown to choose a new scene or layer to duplicate.
Add, customize, and edit text layers within your Scenes.
Add A Text Layer
Section titled “Add A Text Layer”- Navigate to the Layers panel.
- Click the ╋ icon to add a new layer.
- Select Text from the list.
Edit Text Content
Section titled “Edit Text Content”Type directly in the Text block in the Inspector panel, or paste in your content. You can also add emojis, icons, and symbols.
Select Fonts
Section titled “Select Fonts”Use the Font dropdown menu in the Inspector panel to choose between different fonts.
Font Weight
Section titled “Font Weight”Use the dropdown menu to adjust the font weight, such as Regular, Bold, Italic, and more. The available font weight options depend on the specific font family style.
Font Size
Section titled “Font Size”Use the font size text field to enter a specific pixel value, or click and drag the font size icon to the left to reduce or to the right to increase the size.
Text Color
Section titled “Text Color”Use the color picker to apply a custom color to your text.
- Choose a text color by clicking the color picker to select a color, or entering a
HEXvalue. - Click Ok to save the color update.
Background Color
Section titled “Background Color”Enable the Background color option to add a custom-colored background to your text layer.
- Toggle the Background option on/off using the switch on the right.
- Choose a text background color by clicking the color picker to select a color, or entering a
HEXvalue. - Click Ok to save the color update.
Adding Gradient Color
Section titled “Adding Gradient Color”Use the Effects panel to apply the Gradient color to your text layer.
Read Content From File
Section titled “Read Content From File”When enabling this functionality, Meld allows you to incorporate external text content directly into your scenes. Any changes made to the external file will automatically update in Meld once the file is saved.
Markdown
Section titled “Markdown”This adds a layer that supports Markdown markup language for formatting text. This simplifies text styling and enhances your content creation experience for presentations and dynamic use in your productions.
Add A Markdown Layer
Section titled “Add A Markdown Layer”- Navigate to the Layers panel.
- Click the ╋ icon to add a new layer.
- Select Markdown from the list.
Edit Text Content
Section titled “Edit Text Content”You can conveniently format text directly in the Content text block located in the Inspector panel.
Read Content From File
Section titled “Read Content From File”You can read content from a Markdown file in Meld Studio, using your preferred text or code editor to view real-time updates within Meld.
Rectangle
Section titled “Rectangle”Use the Rectangle layer to create rectangles, squares, lines, frames, and circles. This layer is also ideal for adding solid colors, gradient backgrounds, camera overlays, and lower-thirds backgrounds to your scenes, and for creating unique looks using Effects.
Add a Rectangle layer
Section titled “Add a Rectangle layer”- Navigate to the Layers panel.
- Click the ╋ icon to add a new layer.
- Select Rectangle from the list.
Update or disable the rectangle fill color.
- Toggle the Color option on/off using the switch on the right.
- Choose a fill color by clicking the color picker to select a color, or entering a
HEXvalue in the input field. - Click Ok to save the color update.
- Adjust the opacity of the color fill using the percentage field. The default is 100%.
Border
Section titled “Border”Enable and customize the color of the rectangle's border. This feature is great for creating camera overlays. Combine it with other layer types to design frames, outlines, or unique visual effects.
- Toggle the Border option on/off using the switch on the right.
- Choose a border color by clicking the color picker to select a color, or entering a
HEXvalue. - Click Ok to save the color update.
- Set the border thickness by entering a value in the pixel text field, or hover your cursor over the icon, then click and drag left to reduce or right to increase.
Adjust Rectangle Corner Radius
Section titled “Adjust Rectangle Corner Radius”Like the other layers, Rectangles also have four circle handles on the inside of every corner. These handles allow you to round the corners of the rectangle and turn it into a circle, for example.
Widget
Section titled “Widget”Widgets are a type of interactive layer in Meld Studio.
They react to live events from your stream (such as follows, subs, bits, or Super Chats) and provide visual feedback directly on the canvas.
To add a widget:
- Navigate to the Layers panel.
- Click the ╋ icon to add a new layer.
- Select Widget from the list.
- Select a Widget option: Combo Widget or Spotlight.
Combo Widget
Section titled “Combo Widget”The Combo Widget is an animated effect triggered by repeated audience support.
As more events occur (subs, bits, followers, etc.), the animation intensifies. This creates a momentum effect to highlight audience engagement.
Spotlight
Section titled “Spotlight”The Spotlight Widget creates a dynamic carousel of alerts for:
- New followers
- Bits
- Subscriptions
- Super Chats
Each event is shown with the user’s name and an icon. The widget continuously cycles through recent events, making them more visible on stream.
Widget Customization
Section titled “Widget Customization”All widgets can be customized.
Available customizations:
- Change font, size, and colors.
- Enable and disable stream events.
- Modify the event text and labels.
- Preview and test directly in the editor.
To customize a widget:
- Select it on the canvas.
- Use the Inspector Panel to adjust appearance and behavior.
Layer Properties
Section titled “Layer Properties”Inspector Panel
Section titled “Inspector Panel”Every layer will have particular properties associated with it, which you can find and modify using the Inspector panel.
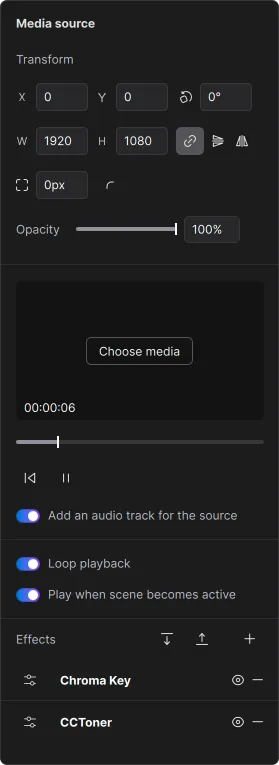
The Inspector panel provides controls for customizing the properties of your selected layers, like position on the canvas, its dimensions like width and height, layer opacity, effects, and others.
Transform
Section titled “Transform”The group of properties that every layer has in common is the Transform and Effects.
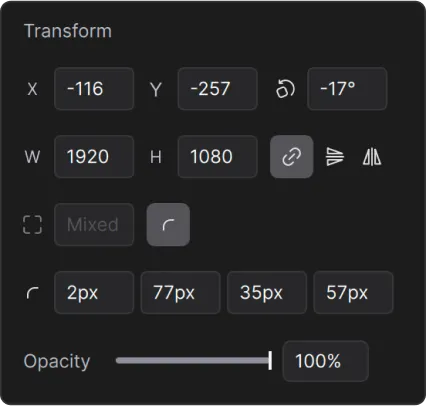
The Transform section includes:
- Position
- Rotation
- Dimensions
- Aspect Ratio
- Layer Flip
- Corner Radius
- Opacity
Position
Section titled “Position”Adjust the position of layers in the canvas along any of the two axes: horizontal (X axis) and vertical (Y axis). Meld represents a layer's position in the Inspector panel using X and Y coordinates.
Rotation
Section titled “Rotation”Rotate individual layers or a selection of layers.
Every layer you add to the canvas will have a default rotation of 0°. You can rotate your layer 360° in each direction.
To rotate a layer:
Inspector Panel
Section titled “Inspector Panel”- Select the layer(s) you want to rotate.
- Use the rotation field to enter your desired rotation value.
- Or hover the rotation icon, click, and drag left or right.
Canvas
Section titled “Canvas”- Selected and hover just outside one of the layer's bounds until the rotation mouse cursor appears.
- Click and drag to rotate your selection.
- Hold down Key: Shift ⇧ to snap rotation values to increments of
15º.
Dimensions
Section titled “Dimensions”Every layer will have its dimensions, represented by the width (W) and height (H). You can also view the dimensions in the blue label under the layer's bounding box, or in the Inspector panel in theW and H fields.
Aspect Ratio
Section titled “Aspect Ratio”Find the aspect ratio option next to the W and H fields. When a layer aspect ratio is locked, it maintains the current proportions intact when resizing it. When the aspect ratio is unlocked, the layer's original proportions are no longer maintained.
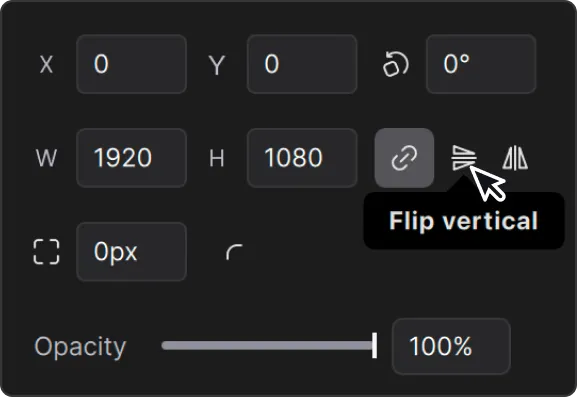
Layer Flip
Section titled “Layer Flip”Apply Vertical and Horizontal flip transformations on layers.
- Select the layer you want to update.
- Navigate to the Transform section in the Inspector panel.
- Click the icons for Flip Vertical or Flip Horizontal to make the changes.
Flip Horizontal
Section titled “Flip Horizontal”Flip Vertical
Section titled “Flip Vertical”Corner Radius
Section titled “Corner Radius”The Corner Radius feature allows you to adjust the corners of any layer. You can customize all corners equally or adjust each corner individually.
When a layer is selected (unlocked and visible), you'll notice four circle handles on the inside of every corner. These handles allow you to round the corners of the layer.
Inspector
Section titled “Inspector”- Select the layer.
- Enter a pixel value in the Corner radius field or hover your cursor over the corner radius icon, then click and drag left to reduce or right to increase.
Canvas
Section titled “Canvas”- Select the layer you want to update.
- Drag the corner radius handles to adjust the radius.
Independent Corner Radius
Section titled “Independent Corner Radius”Adjust the individual corner radius of layers to create a custom shape.
Inspector
Section titled “Inspector”- Select the layer you want to update.
- Click on the Individual corners radius icon.
- In the corner radius details section, you can:
- Enter a pixel value for each corner.
- Hover your cursor over the text fields, then click and drag left to reduce or right to increase.
Canvas
Section titled “Canvas”- Select the layer you want to update.
- Hold down the modifier key to activate individual corner settings.
- Mac: Key: Option ⌥
- Windows: Key: Alt Alt
Opacity
Section titled “Opacity”Adjust the layer Opacity using the slider or text field in the Inspector panel. Opacity is represented as a percentage (%). Every layer added has a default opacity value of 100%.
- Select the layer you want to update.
- Navigate to the Inspector panel
- Click and drag the opacity slider handle left or right or type a value into the text field.
General Layer Adjustments
Section titled “General Layer Adjustments”Fill Mode
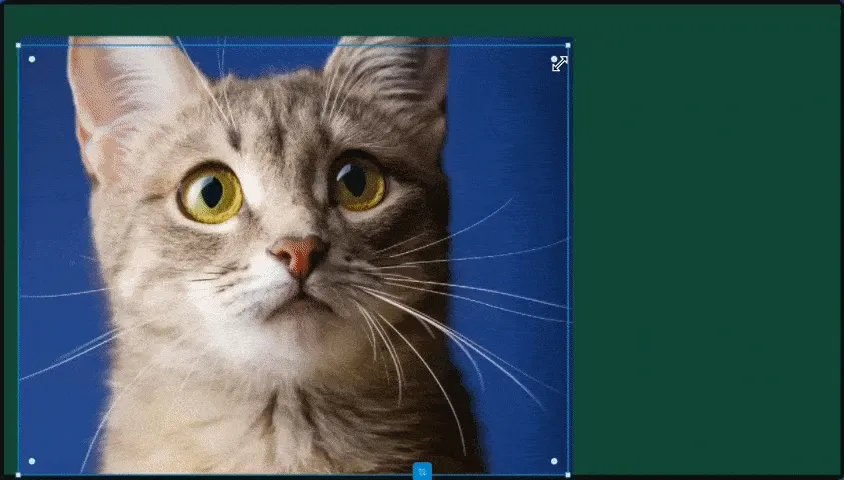
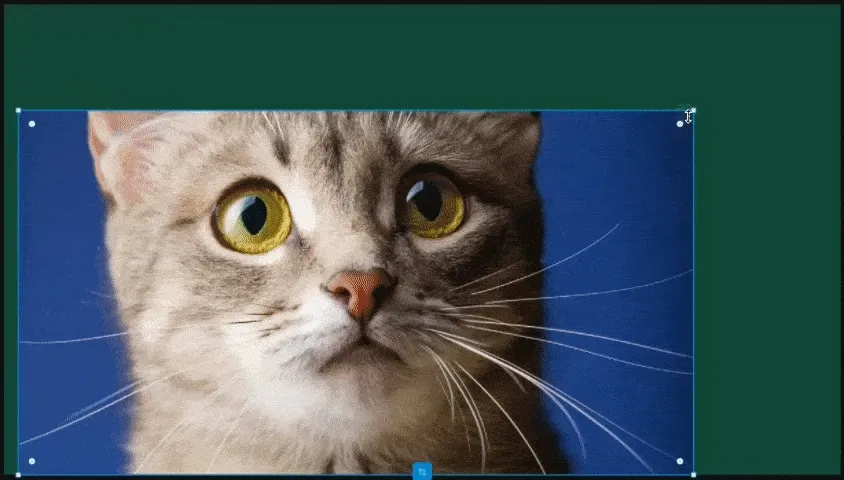
Section titled “Fill Mode”Meld provides three Fill Modes: Fit, Fill, and Stretch. Fill Mode determines how your content fits within a layer. These modes take into account the dimensions of both the source content and the layer it’s applied to. The selected Fill Mode remains applied even as you scale or manipulate the layer, giving you consistent control over how your content is displayed.
The Fit mode scales your content so the entire source is visible within the layer. It preserves the content’s aspect ratio, ensuring no part of it is cropped or hidden.
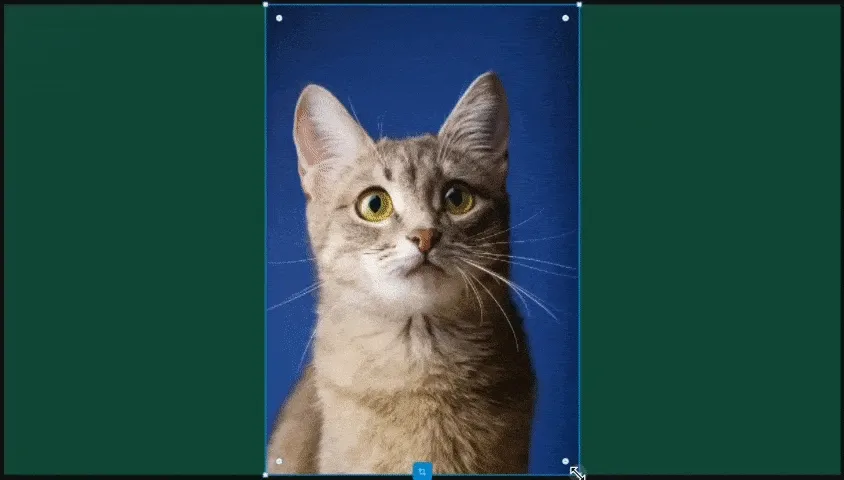
The Fill mode scales the content to completely cover the layer. This mode may crop parts of the source content. It ensures that the layer is fully filled without leaving any blank spaces.
Stretch
Section titled “Stretch”The Stretch mode can resize the layer to match the dimensions of the content. Stretch allows breaking the original aspect ratio, which can result in distortion.
Layer Locking
Section titled “Layer Locking”Locking layers prevents the layer source from moving from its position, and from being cropped.
If you lock a layer, you can't select it via the normal left-click selection process. However, select it only via the Layers panel.
- Navigate to the Layers panel and hover the layer.
- Click the lock icon to the right of the layer to lock it.
Unlock
Section titled “Unlock”- Locate the locked layer marked with the lock icon.
- Click the lock icon to unlock the layer.
Layer Hiding
Section titled “Layer Hiding”If you hide a layer, it won't show on canvas, but you can still select it. Toggle visibility on to make visible changes to the layer.
- Navigate to the Layers panel and hover the layer.
- Click the eye icon to the right of the layer to hide it.
Unhide
Section titled “Unhide”- Locate the hidden layer represented by the eye icon.
- Click the eye icon to unhide the layer.
Renaming Layers
Section titled “Renaming Layers”- Double-click the layer you want to rename.
- Type the name you want to give to the layer.
- Press Key: Enter Enter or click away to save the changes.
or
- Right-click the layer.
- Click Rename.
- Type the name you want to give to the layer.
- Press Key: Enter Enter or click away to save the changes.
Reordering Layers
Section titled “Reordering Layers”Adjust the order of a layer by changing the layer's position in the Layers panel.
- Navigate to the Layers panel.
- Click and drag the layer to change it's position in the layer hierarchy:
- Move the layer up to bring the layer forward.
- Move the layer down to send the layer back.
- Release to apply.
Moving Layers Up and Down
Section titled “Moving Layers Up and Down”- Select the layer(s) in the canvas or the Layers panel.
- Right-click on the selection to open the context menu:
- Choose from:
- Move Up
- Move Down
Copy & Paste
Section titled “Copy & Paste”Copy a layer and paste it into the same or a different scene.
Select the layer.
Copy using the keyboard shortcut.
- Mac: Shortcut Keys: Command + C ⌘ C
- Windows: Shortcut Keys: Ctrl + C Ctrl C
Navigate to where you want to paste the layer:
Paste using the keyboard shortcut:
- Mac: Shortcut Keys: Command + V ⌘ V
- Windows: Shortcut Keys: Ctrl + V Ctrl V
Alternatively:
- Right-click on a layer and select Copy.
- Navigate to where you want to paste, right-click, and select Paste.
Multi-select
Section titled “Multi-select”Select more than one layer at a time.
- Select a layer in the canvas or the Layers panel.
- Hold down the Key: Shift ⇧ key and click on another layer.
- This will allow you to select as many layers as you like.
Selection Marquee
Section titled “Selection Marquee”The marquee tool allows you to select all layers in a specific area of the canvas.
- Click and hold on an empty part of the canvas.
- Drag the cursor across any layers you'd like to select.
- A blue overlay will indicate the area, and layers in the selection will be in a bounding box.
- To remove a layer from the selection, hold down the Shift key and click on the layer.
Select Multiple Layers In The Layers Panel
Section titled “Select Multiple Layers In The Layers Panel”When you select layers in the Layers panel, there are some different rules:
To select every layer between two layers:
- Click on the first layer to select.
- Hold down the Key: Shift ⇧ key.
- Select the last layer.
- Meld will select every layer between those two layers.
To select individual layers:
- Click on the first layer to select.
- Hold down the modifier key
- Mac: Key: Command ⌘
- Windows: Key: Ctrl Ctrl
- Select any other layers you want to select.
Deselect layers
Section titled “Deselect layers”- Click on an empty area of the canvas.
- Use the keyboard shortcut Key: Esc Esc .
Cropping can be done directly from the quick-actions toolbar that appears at the top of the layer’s bounding box when the layer is selected.
- Select a layer to reveal the bounding box and quick-actions toolbar.
- Click the Crop icon in the toolbar.
- Drag the corner or edge handles to define the visible crop area.
- Click anywhere on the canvas or press Done to apply the crop.
You can also click and drag to reposition the layer content.
Reset crop
Section titled “Reset crop”Cropping in Meld Studio is non-destructive. The original content is never deleted—just hidden.
To reset a cropped layer:
- Select the layer to show the quick-actions toolbar.
- Click the Reset icon next to the Crop icon.
- The full layer content will be restored immediately.
Or
- Right-click on the layer you want to update.
- Click Reset Crop in the context menu.
Deleting Layers
Section titled “Deleting Layers”- Right-click the layer.
- Select Delete layer.
How do I capture games?
Section titled “How do I capture games?”You can capture a game by adding a Display Capture layer and selecting the game application window.
Can I add multiple layers of the same type?
Section titled “Can I add multiple layers of the same type?”Yes, you can add as many layers of the same type as needed to your scenes.
How do I rename a layer?
Section titled “How do I rename a layer?”Double-click the layer name in the Layers Panel or right-click the layer and select Rename from the context menu.
Can I copy and paste layers across scenes?
Section titled “Can I copy and paste layers across scenes?”Yes, you can copy a layer from one scene and paste it into another using shortcuts or the context menu.
How do I add audio from a Display Capture, Browser, or Media source layer?
Section titled “How do I add audio from a Display Capture, Browser, or Media source layer?”Toggle on the Add an audio track for the source option in the Inspector Panel for the layer.
What media file formats are supported?
Section titled “What media file formats are supported?”Supported formats include MP3, MP4, MOV, WebM.
How do I refresh a Browser URL?
Section titled “How do I refresh a Browser URL?”Use the reload icon after the URL field to refresh the source.
Can I use custom fonts for text?
Section titled “Can I use custom fonts for text?”Yes, if you have custom fonts installed, navigate to the Font dropdown in the Inspector Panel to choose from available fonts.
What is a Markdown layer?
Section titled “What is a Markdown layer?”A Markdown layer allows you to format text using Markdown syntax, ideal for dynamic text or presentations.
What image formats are supported in the Image layer?
Section titled “What image formats are supported in the Image layer?”Supported formats include PNG, JPG, JPEG, GIF, and WebP.
Can I crop a layer?
Section titled “Can I crop a layer?”Yes, double-click the layer or use the crop icon to enter crop mode.
Can I independently adjust the corner radius of a layer?
Section titled “Can I independently adjust the corner radius of a layer?”Yes, enable the Individual Corners option in the Inspector Panel to set different radii for each corner.
Hold down the modifier key to activate individual corner settings on canvas.
- Mac: Key: Option ⌥
- Windows: Key: Alt Alt
How do I delete multiple layers?
Section titled “How do I delete multiple layers?”Select all the layers you want to delete, right-click on one of the selected layers, and choose Delete Layers from the context menu.