Clipping
Section titled “Clipping”Clipping allows short video segments to be captured from your canvas in real time.
To create clips, Clipping must be enabled. When active, Meld Studio keeps the encoder running continuously in the background, even when not streaming or recording.
This ensures that the content is always available for clipping.
Clips will also use the selected Canvas settings, using the same resolution, video and audio bitrates, framerate, and hardware encoder. For the Portrait Canvas, the resolution is fixed at 1080×1920. All other settings will match the Main Canvas, except for bitrate, which can be customized separately.
Enable Clipping
Section titled “Enable Clipping”Enable clipping to be able to start clipping.
- Navigate to
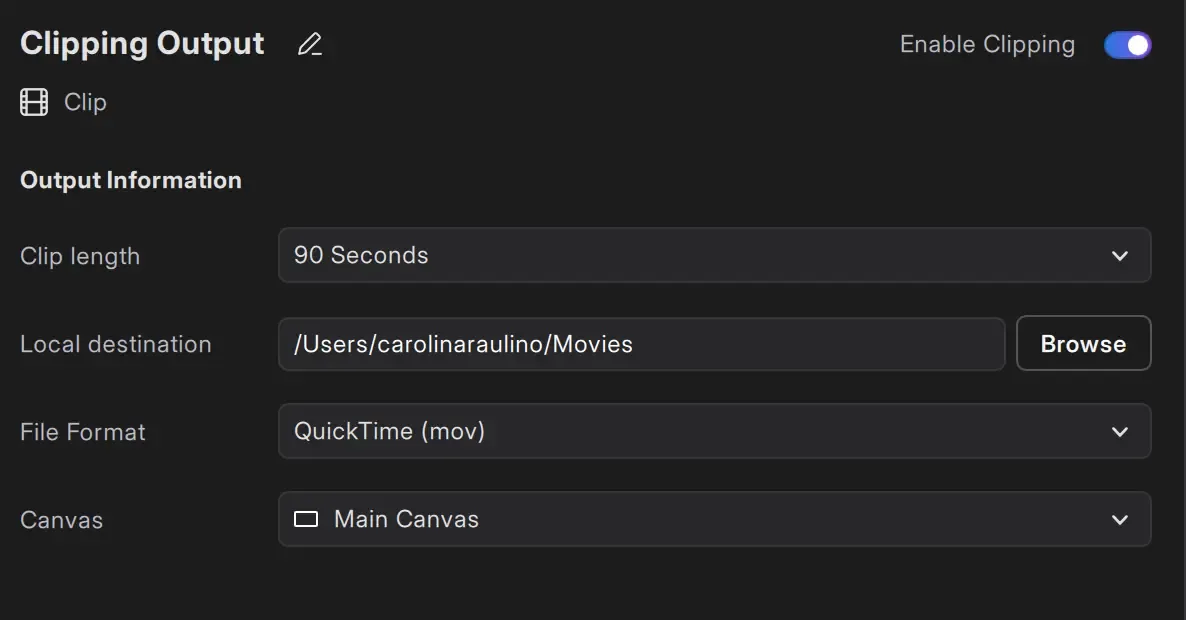
Settings → General → Clipping - In the output settings, use the toggle at the top right to Enable Clipping.

Make A Clip
Section titled “Make A Clip”- Navigate to the top-right corner of the main viewport.
- Find the Clip button on the right side of the Record button.
- Click the Clip button.
Replay Clip
Section titled “Replay Clip”Replay Clip is designed to keep you in the moment. As soon as a clip is created, you can choose to have it play back inside the scene automatically, so you can relive and react without interrupting your workflow. There's no need to locate the file or configure anything, it just plays, right where your audience is watching.
How It Works?
Section titled “How It Works?”Right after creating a clip in Meld Studio, you'll have the option to watch it instantly.
If you choose to replay the clip, it appears directly in your current scene, on the main canvas, as a temporary overlay with playback controls.
Quick-Controls
Section titled “Quick-Controls”Once a Replay Clip is loaded into the scene, you can interact with it directly using the quick-controls interface. It provides playback tools that are fast, responsive, and fully integrated into the canvas.
You can scrub the timeline, define loop points, adjust playback speed, and toggle audio, all without leaving the scene or interrupting your stream.
Available Controls
Section titled “Available Controls”Timeline Scrubbing
Drag the scrubber to navigate the clip with precision.
Loop Points (A/B handles)
Set a loop range using the left and right handles. The clip loops continuously between them.
Playback Speed
Click the speed buttons to slow down or speed up playback. A turtle (slower) and rabbit (faster) icon represent each end of the range.
Audio Toggle
Mute or unmute the replay. It uses its own global audio track in the Audio Mixer.
Dismiss Replay
Click the ㄨ icon to remove the replay layer from the scene.
Every time you create a clip, you can instantly load it back into your scene and interact with it live.
Clip Settings
Section titled “Clip Settings”Clip Length
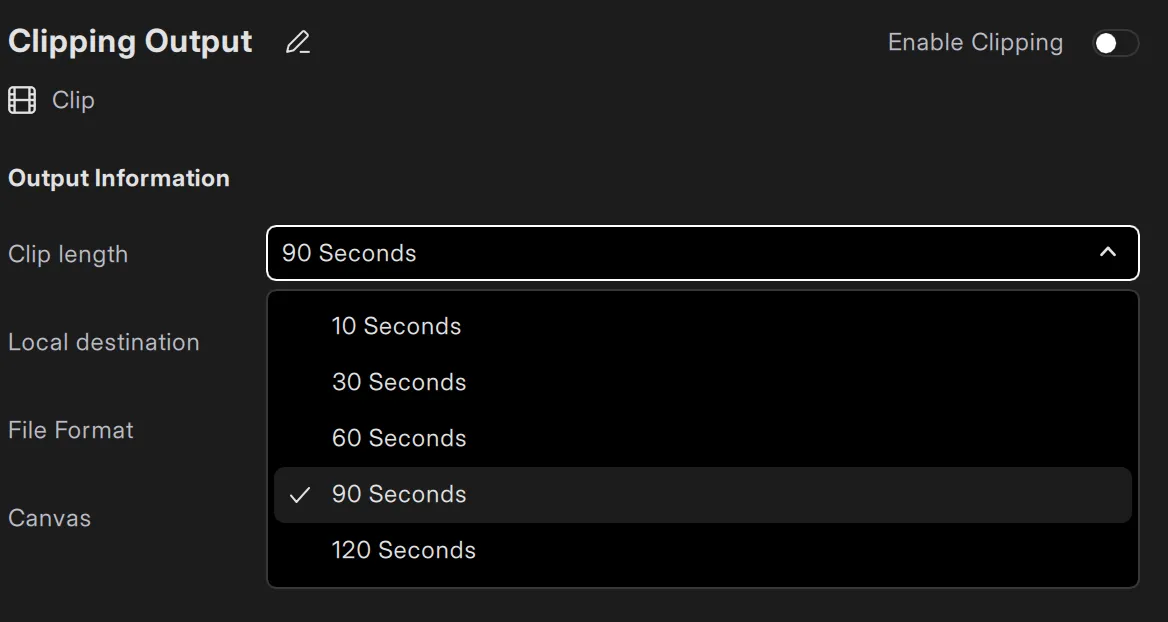
Section titled “Clip Length”Set the Clip length in the Clipping Output settings. The length options are:
- 10 Seconds
- 30 Seconds
- 60 Seconds
- 90 Seconds (default)
- 120 Seconds

Local Destination
Section titled “Local Destination”You can choose where your recorded files are saved by setting a local destination:
- Navigate to
Settings → General → Clipping - In the output settings, locate the Local Destination field.
- Click the Browse button.
- Select the folder or directory where you want your clips to be saved.
- Optionally, you can also manually paste a file path URL, such as:
file:///Users/MainUser/SocialMedia/Clips/30seconds
Your clips will now automatically save to the specified folder.

File Format
Section titled “File Format”Meld Studio offers three file format options for clips:
- QuickTime (mov)
- Matroska (mkv)
- Flash Video (flv)
Canvas Output
Section titled “Canvas Output”Select which canvas to clip.
