Learn how to use the Audio Mixer to add audio tracks, manage audio sources, apply audio effects, toggle audio monitoring, and configure other audio settings in Meld Studio.
Audio Mixer
Section titled “Audio Mixer”The Audio Mixer allows for the management of multiple audio tracks. It provides features like real-time audio monitoring CUE, built-in audio effects, Twitch VOD track settings, independent track adjustments, and clear audio feedback that helps to avoid audio distortion and clipping, for perfect audio quality.
Audio Track
Section titled “Audio Track”Audio tracks in Meld allow you to separate, control, and manage different audio sources independently. Mix game audio, microphone, or background music with complete control over each track.
Add an Audio Track
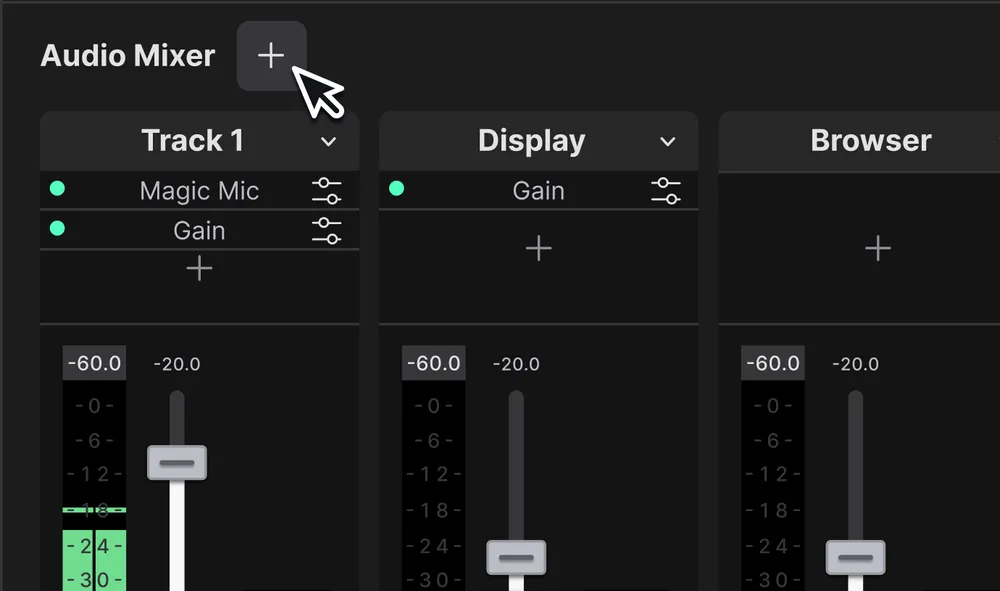
Section titled “Add an Audio Track”- Navigate to the Audio Mixer.
- Click the ╋ icon next to the Audio Mixer label.
- Click the dropdown menu at the bottom of the audio track to select the audio source.
Customize Audio Per Scene
Section titled “Customize Audio Per Scene”Linked/Unlinked Audio Tracks
Section titled “Linked/Unlinked Audio Tracks”In Meld, audio tracks can behave either globally (the same across all scenes) or independently per scene. This allows you to control volume and mute settings differently for each scene if needed.
A Global Audio Track is every audio track added to the audio mixer via the ╋ button.
Linked Audio Tracks (Default)
Section titled “Linked Audio Tracks (Default)”By default, all audio tracks are linked. That means:
- All settings, including volume, mute, CUE, VOD Track, Audio Source, Audio Effects, and others, are shared across all scenes.
Unlinked audio Tracks (Per Scene)
Section titled “Unlinked audio Tracks (Per Scene)”When you unlink a track:
- Only its volume and mute settings become specific to the current scene.
Unlink a track by clicking the link icon button in the Audio Track.
Once unlinked, customize how the track volume and mute settings behave in the current scene. To have different behavior in other scenes as well, unlink the same track in each of those scenes individually.
Link the audio track back to global volume at any time by toggling the button again.
Example Use Case
Section titled “Example Use Case”A common use case is muting your microphone in specific scenes like Starting Soon or Be Right Back, while keeping it active in your main Live scene.
- Unlink the Microphone track in the Starting Soon and BRB scenes.
- Mute the track in each of those scenes.
This way, your mic stays muted only in those scenes and remains active in others like Live or Gameplay. Watch the tutorial video below for a more detailed walkthrough.
Linked vs. Unlinked Audio Track Behavior
Section titled “Linked vs. Unlinked Audio Track Behavior”| Setting | Linked Behavior | Unlinked Behavior (Per Scene) |
|---|---|---|
| Volume | Global | Scene-specific |
| Mute | Global | Scene-specific |
| VOD Track | Global | Global |
| CUE | Global | Global |
| Audio Source | Global | Global |
| Mono/Stereo | Global | Global |
| Delay | Global | Global |
| Input Channel | Global | Global |
Layer Associated Audio Track
Section titled “Layer Associated Audio Track”A layer associated audio track is every audio track linked to a Display capture, Browser, or Media source layers.
An audio track can be added to a scene by adding one of these 3 types of layers via the inspector panel.
- Navigate to the Layers Panel
- Click the ╋ icon next to Layers to add a source.
- Navigate to the Inspector panel.
- Toggle the Add an audio track for the source button to add the captured displays' audio to the audio track (If you wish to add the audio separately, make sure this option is disabled).
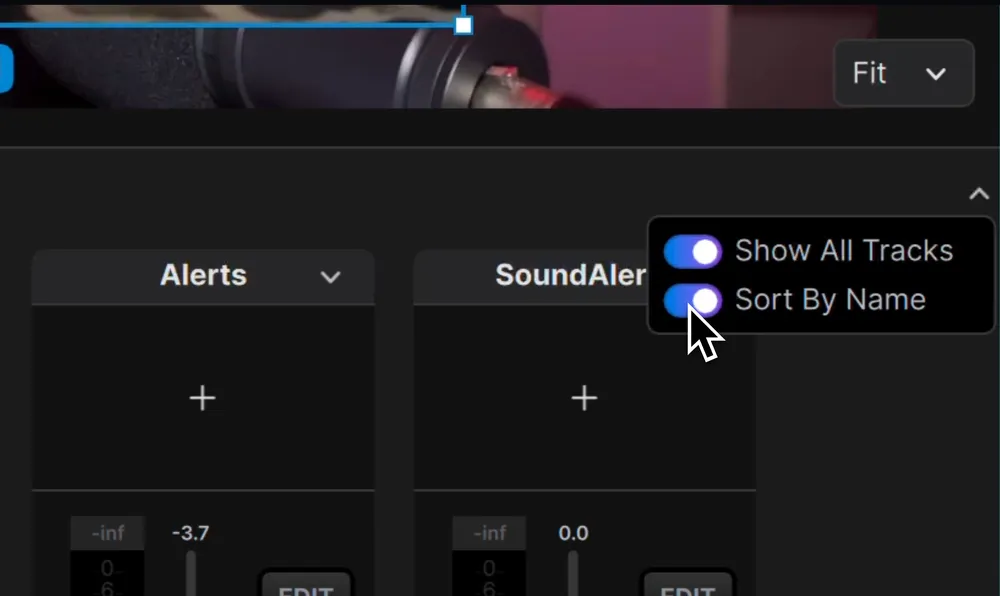
Update the Audio Mixer view from the dropdown menu at the top-right corner of the panel.
Promote An Audio Track To Global
Section titled “Promote An Audio Track To Global”Promote an audio track to global to make it play across all scenes, independently of where the source layer is present.
- Navigate to the audio track.
- Click the
EDITbutton to edit track settings. - Toggle the Global Audio Track option.
This action will move the audio track to the front (left side of the Audio Mixer), placing them before non-global audio tracks. This will also enable the link button for that track.

Reveal The Source Layer
Section titled “Reveal The Source Layer”Quickly access the layer linked to an audio track. This feature is useful for easily locating the source layer of an audio track to make adjustments, updates, or fixes.
To reveal the source layer in the scene:
- Navigate to the audio track in the Audio Mixer.
- Right-click the label at the bottom of the audio track.
- Select
Reveal layer in scene. - Meld Studio will take you to the layer's location.
Audio Track Settings
Section titled “Audio Track Settings”Audio Monitoring (CUE)
Section titled “Audio Monitoring (CUE)”Monitor audio in real-time with minimal delay using Meld Studio. This feature is perfect for adjusting your audio settings and volume levels, configuring audio effects, and ensuring your mix sounds exactly as intended.
Monitor your microphone, audio interfaces, game sounds, browser alerts, media sources, and more.
To enable audio monitoring:
- Navigate to the audio track you want to monitor audio.
- Toggle the
CUEbutton to start monitoring audio.
Mute/Unmute
Section titled “Mute/Unmute”Muting an audio track provides several benefits.
Instantly silence an audio track with MUTE to prevent it from being heard in your stream or recording. Use this action to disable specific audio sources without affecting their settings.
- Navigate to the audio track in the
Audio Mixer. - Toggle
MUTEon.
To unmute audio, simply click MUTE again.
Stereo to Mono
Section titled “Stereo to Mono”By default, every audio track added to the audio mixer is set to Stereo. To set the audio track to Mono, follow the steps:
- Navigate to the audio track.
- Click the
EDITbutton to edit track settings. - Switch to
Mono. - Select the input channel from the
Inputdropdown.
Channel Remap
Section titled “Channel Remap”The Audio Channel Remap feature in Meld Studio allows you to edit how audio channels are distributed. Meld supports over 32 audio channels from various interfaces.
This feature is invaluable for creators working with complex audio setups, as it streamlines channel routing and ensures consistent, professional-quality audio for any content.
To remap audio channels:
- Navigate to the audio track you want to edit.
- Click the
EDITbutton to edit track settings. - If the audio track is set to Stereo, edit the
LeftandRightinput channels. - Ensure
CUEis on for real-time audio monitoring.
Audio Delay
Section titled “Audio Delay”The audio delay settings in Meld Studio allow you to adjust the timing of an audio track to ensure it stays perfectly synchronized with your video and other audio sources.
- Navigate to the audio track you want to edit.
- Click the
EDITbutton to edit track settings. - Hover the
Delaytext field, click and drag left to decrease or right to increase the delay value, or click the text field to type a fixed value (the delay is adjustable in milliseconds).
Exclude from VOD Track
Section titled “Exclude from VOD Track”The VOD Track is designed for the Twitch VOD Track conmpliance, in which you can designate certain audio tracks to be excluded from your VODs.
This is particularly useful for managing music or other audio elements that may have licensing restrictions, ensuring compliance with Twitch's policies. Make sure to review the Twitch guidelines.
To exclude audio from the VOD Track follow these steps:
- Navigate to the audio source track you want to edit.
- Click the
EDITbutton to edit track settings. - Click the Exclude from VOD Track option.
- A tag labeled
VOD-EXCLwill be displayed on the audio track to indicate which tracks have the option enabled.
You can enable or disable this option even while streaming.
Audio Sources
Section titled “Audio Sources”Meld Studio provides three distinct Audio source options on Windows.
Audio Input Device
Section titled “Audio Input Device”The Audio Input Device source is the audio from external input devices, such as microphones, capture cards, audio interfaces, virtual input devices, and others.
Audio Output Device
Section titled “Audio Output Device”The Audio Output Device source loops back audio playing through your system's output devices.
Process Audio
Section titled “Process Audio”Process Audio will capture audio from specific processes or applications running on your system. This is perfect for games, browsers, music applications, and others.
When adding an audio track, you can switch between the Audio Sources options and search for audio sources.
- Navigate to the Audio Mixer.
- Click the ╋ icon to add an Audio Track.
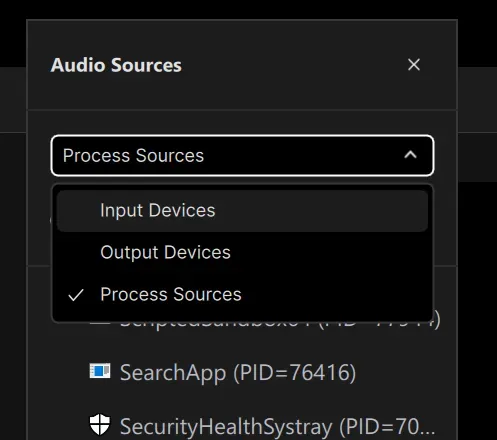
- At the bottom of the Audio Track, click the dropdown menu to select an audio source.
- Click the dropdown in Audio Sources to pick the source category: Input Devices, Output Devices, or Process Sources.
- Select the source to start capturing audio.
Audio Effects
Section titled “Audio Effects”Meld Studio offers built-in audio effects that can be applied to any audio track.
Magic Mic
Section titled “Magic Mic”Magic Mic is Noise Suppression with an Automatic Gain control option. This audio effect filters out background noise based on the desired strength and allows you to enable automatic Gain control to automatically adjust your microphone gain.
Navigate to the audio track.
Click the ╋ icon in the audio effects rack.
Select Magic Mic.
Click the settings icon.
Choose the suppression strength that best fits your use case:
- Low
- Moderate
- High
- Very high
Allows you to adjust your audio sensitivity to boost the volume or tone out potential background noise.
How To Add & Adjust Gain
Section titled “How To Add & Adjust Gain”- Navigate to the audio track.
- Click the ╋ icon in the audio effects rack.
- Select Gain.
- Click the settings icon.
- Adjust the gain slider to increase or decrease the volume as needed.
Stereo Panner
Section titled “Stereo Panner”It lets you position your audio source in the stereo field, balancing sound placement and correcting audio imbalances for a more immersive and professional listening experience.
How to Add & Adjust Stereo Panner
Section titled “How to Add & Adjust Stereo Panner”- Navigate to the audio track.
- Click the ╋ icon in the audio effects rack.
- Select
Stereo Panner. - Click the settings icon.
- Adjust the Pan slider to move the audio Left (L) or Right (R) in the stereo field.
Toggle Bypass
Section titled “Toggle Bypass”The Toggle Bypass disables an effect without deleting it.
- Click on the green dot on the audio effect slot.
Or
- Right-click on the audio effect slot and select
Toggle Bypass.
Remove Audio Effects
Section titled “Remove Audio Effects”To remove an audio effect from an audio track:
- Right-click on the audio effect slot and click
Delete.
Audio Settings
Section titled “Audio Settings”Set up your Output device Audio settings in Meld.
To make updates in the Audio Output device:
- Navigate to Settings → Audio.
- Select the output device by clicking on the dropdown menu.
- Restart Meld Studio to apply the changes made.
How do I add an audio track to the Audio Mixer?
Section titled “How do I add an audio track to the Audio Mixer?”Navigate to the Audio Mixer, click the ╋ button next to the Audio Mixer label, and select your desired audio source.
What is the CUE button in the Audio Track?
Section titled “What is the CUE button in the Audio Track?”The CUE button enables real-time monitoring of an audio track.
How do I add audio from a Display Capture, Browser or Media source layer?
Section titled “How do I add audio from a Display Capture, Browser or Media source layer?”Toggle on the Add an audio track for the source option in the Inspector Panel for the layer.
How can I hear my Browser Alerts audio?
Section titled “How can I hear my Browser Alerts audio?”To hear your alerts' audio in Meld Studio, ensure the Browser layer's audio track is added to the Audio Mixer. Then, enable audio monitoring by toggling the CUE button in the Browser audio track.
How do I delete an audio track?
Section titled “How do I delete an audio track?”Navigate to the Audio Mixer, right-click the track, and select Delete.
How do I switch an audio track to Mono?
Section titled “How do I switch an audio track to Mono?”Navigate to the audio track, click EDIT, and toggle the Mono option. You can also select which input channel to use.
How can I adjust the audio delay?
Section titled “How can I adjust the audio delay?”Navigate to the audio track, click EDIT, and adjust the delay value in milliseconds using the delay text field.
What is the Twitch VOD Track feature?
Section titled “What is the Twitch VOD Track feature?”This feature allows you to exclude specific audio tracks from Twitch Video On Demand (VOD) recordings, which is helpful for avoiding licensing issues with music.
How do I exclude an audio track from a Twitch VOD?
Section titled “How do I exclude an audio track from a Twitch VOD?”Navigate to the audio track, click EDIT, and toggle the Exclude from Twitch VOD Track option.
Why is there no sound from my audio track?
Section titled “Why is there no sound from my audio track?”- Ensure the correct audio source is selected.
- Check if the track is muted or if
CUEis toggled off. - Confirm your system's audio devices are configured properly.
Why is my audio out of sync with my video?
Section titled “Why is my audio out of sync with my video?”Audio desynchronization can happen due to latency in your setup. To fix this:
- Navigate to the audio track in the Audio Mixer.
- Click EDIT and adjust the Delay value (in milliseconds) to align the audio with your video.
If the issue persists after adjusting the delay, it could be related to your hardware or a potential bug. Contact our support team with details about your setup, and we'll assist you further.