On this page
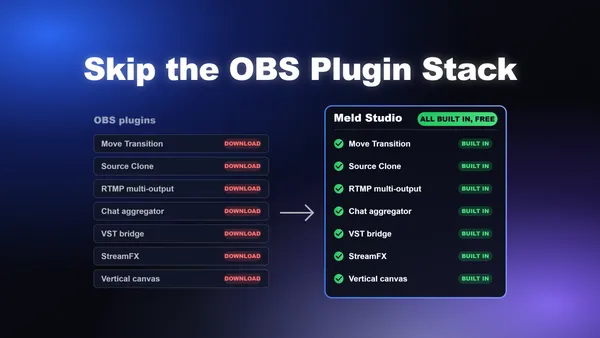
If you've spent any time building a professional streaming setup in OBS, you know the plugin tax: Move Transition for animated scene changes, a multistreaming relay for simulcasting, a third-party chat aggregator for reading multiple platforms, Source Clone to reuse a camera without filter bleed, VST bridge software for audio processing. Each plugin is a separate download, a separate compatibility check after every OBS update, and another potential point of failure on the night you go live.
Meld Studio was built to eliminate that stack. The features OBS users spend hours sourcing and configuring are native in Meld, no installation required. This guide maps the most common OBS plugin workflows to their Meld equivalents, so you know exactly what you're getting before you make the switch.
Before you start: Meld can import your existing OBS scenes in one click. Go to File → Import OBS Session and your sources, layouts, and browser overlays transfer automatically. You won't be starting from scratch.
The OBS Plugin Stack vs. Meld's Native Feature Set
Here's a quick reference for the most common OBS plugin workflows and their Meld equivalents. Each section below goes into detail on how to replicate the workflow step by step.
| OBS Plugin | What It Does | Meld Native Equivalent |
|---|---|---|
| Move Transition | Animated source movement between scenes | Built-in Move Transition |
| Source Clone | Duplicate a source with independent filters | Native source duplication |
| Multistreaming relay (e.g. RTMP multi-output) | Simultaneous multi-platform output | Meld Multi (built-in, free) |
| Multi-chat tool | Unified chat from Twitch, YouTube, Kick | Integrated Multi-Chat panel |
| VST bridge (e.g. atkAudio) | Load VST plugins in audio chain | Native VST3 support |
| Source Record plugin | Record individual sources separately | Multi-track audio recording |
| Blur / color grading filters | Visual effects on sources | 30+ built-in effects (blur, LUTs, color grade) |
| Vertical canvas plugin | Portrait-mode output for TikTok/Shorts | Native multi-canvas (landscape + portrait) |
The bottom line: Every workflow in the table above works in Meld without a single third-party download.
Move Transition: Animated Scene Changes Without the Plugin
Move Transition is consistently ranked as the most popular OBS plugin ever made, and for good reason. It turns flat scene cuts into fluid animations where sources slide, scale, and fade between positions. In OBS, getting it requires finding the download, running an installer, and restarting the software. Then you have to reconfigure it after major OBS updates.
In Meld Studio, Move Transition is built in. No download, no installer, no compatibility anxiety.
How to set it up in Meld
- Open Meld Studio and navigate to your Scene Transitions panel.
- Click the + button and select Move Transition from the list (it's already there).
- Set your transition duration. A range of 400-750ms tends to look natural for most setups.
- Switch between scenes. Sources that share the same name across scenes will animate smoothly between their positions automatically.
Getting the best results
The same principles that apply in OBS carry over directly:
- Matched sources animate automatically. If a webcam source exists in both scenes with the same name, Meld matches them and animates the transition between their positions and sizes.
- Turn off zoom on appear/disappear. By default, sources scale when entering or leaving. Most creators prefer to disable this and use a fade instead for a cleaner look.
- Use fade for unmatched sources. Sources that only exist in one scene won't have a match to animate to. Setting those to fade keeps the transition smooth rather than jarring.
The result is the same polished animated transition OBS users spend time configuring, without any of the setup friction.
Source Clone: Reuse Any Source with Independent Filters
Source Clone solves a specific but frustrating OBS problem: when you apply a filter (say, a circular crop or a blur effect) to a source in one scene, it affects that source everywhere. To show a normal webcam in one scene and a stylized version in another, you need a clone, a separate instance of the same source that can have its own filters without affecting the original.
In OBS, Source Clone is a community plugin. In Meld, the same behavior is available natively through source duplication.
How to duplicate a source in Meld
- Right-click any source in your Layers panel.
- Select Duplicate to create an independent copy of that source.
- Apply filters to the duplicate (blur, color grade, rounded corners, etc.) without touching the original.
- Place the duplicate in whichever scenes need the stylized version.
The original source remains unaffected. You can have a clean webcam on your main scene and a circle-cropped, color-graded version on your gameplay scene, all from the same input.
Why this matters for Move Transition users: In OBS, Source Clone and Move Transition work together because the plugin recognizes clones as matches for animation. In Meld, duplicated sources behave the same way with the built-in Move Transition. If your duplicate has the same base source as the original, Meld will animate the transition between them automatically.
Multistreaming: No More RTMP Hacks or Third-Party Relays
Getting OBS to stream to more than one platform simultaneously is a workaround, not a feature. The typical approach involves either a third-party relay service (which adds latency and costs money), manually configuring multiple RTMP outputs, or running a separate tool alongside OBS. It works, but it's fragile and it eats bandwidth.
Meld Multi is Meld's built-in cloud multistreaming service. It's free, it requires zero additional software, and it offloads the upload to the cloud so your local bandwidth stays intact while you stream to multiple destinations at once.
How to set up multistreaming in Meld
- Open Settings → Stream.
- Connect your platform accounts (Twitch, YouTube, Kick, TikTok, Facebook, or custom RTMP).
- Toggle on the platforms you want to go live to.
- Hit Go Live. Meld handles the rest.
What you get that OBS relay setups don't offer:
- Zero bandwidth impact on your local connection. The cloud handles the multi-destination upload.
- Stream Manager. Update your stream title, category, and tags across all connected platforms from a single panel inside Meld. No switching browser tabs.
- VOD Track. A dedicated audio track that strips music from your Twitch VOD automatically, keeping your recordings copyright-safe. This is a one-toggle setup in Meld; it requires manual configuration in OBS.
Creators who relied on third-party relay services to multistream from OBS can replace that entire workflow and its associated cost with Meld's native tooling.
Multi-Chat: Read Every Platform in One Place
OBS has no native chat integration. Streamers who go live on multiple platforms typically end up with a browser tab open for Twitch chat, another for YouTube Live chat, and a third-party tool (or a browser source pointed at a chat aggregator) to bring them together visually. It's a context-switching tax that compounds every time you want to respond to your audience.
Meld's integrated Multi-Chat panel consolidates chat from Twitch, YouTube, and Kick into a single feed inside the application, with no additional software required.
How to use Multi-Chat in Meld
- Connect your streaming accounts in Settings → Platforms.
- Open the Chat panel in the Meld interface.
- All incoming messages from your connected platforms appear in a unified feed, labeled by platform.
There's no browser source to configure, no third-party chat tool to keep running in the background, and no separate window to monitor. Your audience is in one place.
For multistreaming creators specifically: Multi-Chat becomes significantly more valuable when you're live on several platforms simultaneously. Instead of toggling between platform dashboards to read and respond to chat, everything surfaces in Meld's panel. One creator's experience captures it well: switching to Meld meant they could finally acknowledge their YouTube audience at the same speed as Twitch, because both chats were visible in the same place.
VST Audio Plugins: No Bridge Software Required
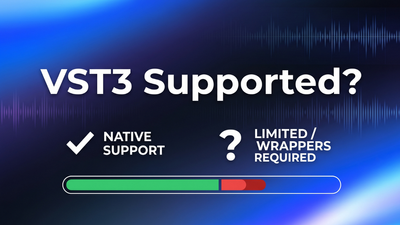
OBS supports VST plugins, but only the older VST2 format natively. Loading VST3 plugins, the current industry standard used by tools like iZotope RX, FabFilter Pro-Q, and Waves plugins, requires an additional bridge tool in OBS. That's an extra piece of software to install, configure, and maintain.
Meld Studio supports VST3 natively, with no bridge required. If you have VST3 plugins installed on your system, Meld can load them directly into the audio filter chain.
How to add a VST3 plugin in Meld
- Navigate to the audio track you want to process in the Audio Mixer.
- Click the + icon in the audio filters rack.
- Select Third-party plugin.
- Browse to your installed VST3 plugin and select it.
- Restart Meld Studio to apply.
Built-in audio processing that covers most use cases
For creators who don't use dedicated VST3 tools, Meld's built-in audio filters handle the most common processing needs without any plugin at all:
- Noise Gate: Cuts mic bleed when you're not speaking
- Compressor with ducking: Automatically lowers background music when your mic is active
- Noise Suppression: Reduces room noise and background hum
- Gain: Adjusts input level before it hits the mixer
- EQ: Shape your frequency response
The practical result: most streamers who used OBS with a VST bridge for basic noise suppression or compression can drop that workflow entirely and use Meld's built-in filters. Creators with more complex audio chains (musicians, podcasters, or anyone running iZotope or FabFilter) can load their VST3 plugins directly, with no bridge in the middle.
Visual Effects: Blur, Color Grading, and More Without StreamFX
StreamFX is one of the most downloaded OBS plugins because OBS's native filter set is limited. Want a Gaussian blur on your webcam background? StreamFX. Want proper color grading or a glow effect? StreamFX. The plugin fills a real gap, but it also adds weight to your setup: it's a large download, it has a history of compatibility issues across OBS versions, and it requires active maintenance to keep working.
Meld ships with over 30 built-in effects that cover the StreamFX use cases most creators actually rely on.
What's built into Meld
- Gaussian blur: Apply to any source, including webcam backgrounds, to create a depth-of-field effect without a green screen
- Color correction and grading: Adjust brightness, contrast, saturation, and hue per source
- LUT support: Import custom LUTs for cinematic color grading, or use the built-in LUT lab to create your own
- Blend modes: Photoshop-style layer compositing (multiply, screen, overlay, etc.) applied live in real time
- Drop shadows and rounded corners: Camera border effects without a separate overlay
- Chroma key: Background removal for green screen setups
How to apply effects in Meld
- Select the source in your Layers panel.
- Click the Effects icon or right-click and choose Filters.
- Browse the effects list and add what you need. Changes apply in real time on the canvas.
For creators who used StreamFX specifically for the blur and color tools, Meld's native effects handle those workflows without the compatibility overhead. The blend modes feature in particular, which mirrors Photoshop's compositing system, gives creators visual control that previously required either StreamFX or a separate graphics tool.
Vertical Streaming and Multi-Canvas for TikTok and Shorts
Streaming in portrait mode from OBS requires either a plugin or a workaround: manually cropping your canvas, setting up a separate scene collection, or using a virtual camera to pipe a vertical output into another application. None of these are clean solutions, and they all add friction to what should be a simple toggle.
Meld supports native multi-canvas output, meaning you can design and stream in both landscape (16:9) and portrait (9:16) simultaneously without any additional configuration.
How to set up vertical streaming in Meld
- Open Canvas Settings in Meld Studio.
- Add a portrait canvas (9:16) alongside your existing landscape canvas.
- Arrange your sources for the vertical layout. Meld treats each canvas independently, so your webcam and game capture can be positioned differently for each format.
- When you go live, both canvases output simultaneously. Your horizontal stream goes to Twitch or YouTube; your vertical stream goes to TikTok Live.
The clipping workflow: Meld's instant replay feature also works in vertical. Hit Clip during your stream and Meld saves the last 30-120 seconds in portrait format, ready for TikTok, YouTube Shorts, or Instagram Reels. No editing software needed, no post-processing step.
This is one of the more significant workflow differences between OBS and Meld. Vertical content has become a core part of how creators distribute their streams, and doing it natively (rather than through workarounds) saves meaningful time across every session.
Widgets and Alerts: No StreamElements or Streamlabs Required
OBS has no native overlay or alert system. The standard workflow involves pointing a browser source at a StreamElements or Streamlabs widget URL, managing those accounts separately, and hoping the browser source loads reliably every session. It works, but it means your stream alerts and overlays live outside your streaming software in a third-party dashboard.
Meld ships with a built-in widget system that covers the most common overlay needs without any external service.
What's included out of the box
- Chat overlay: Display live chat on screen with customizable styling
- Stream alerts: Follower, subscriber, and donation notifications
- Donation goals and follower counts: Progress widgets that update in real time
- Gallery widgets: A library of pre-built overlays, starting soon screens, and interactive widgets available at meldstudio.co/gallery
Building custom overlays with Meld Spark
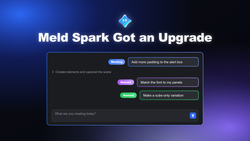
For creators who need something beyond the pre-built options, Meld Spark generates custom overlays from a plain-language description. Describe what you want ("a ticker that scrolls recent followers across the bottom of the screen"), and Spark builds it live on the canvas. No coding, no external widget builder.
Existing StreamElements or Streamlabs browser source URLs continue to work in Meld as browser sources. You don't have to replace those widgets immediately; you can migrate to Meld's native system at your own pace.
Making the Switch
The most common concern OBS users have when switching is losing their existing scene setup. Meld's OBS importer removes that barrier: go to File → Import OBS Session and Meld transfers your scenes, sources, browser overlays, and layout in one step. Over 56,000 creators have used it. Your StreamElements and Streamlabs browser sources come with you unchanged.
From there, the migration is incremental. You don't have to replace every plugin workflow on day one. A practical order:
- Start with Move Transition. It's already there. Switch your default transition and see the difference immediately.
- Set up multistreaming if you were using a relay service. Connect your platforms in Settings and go live to all of them in the same session.
- Open the Chat panel and disconnect your external chat aggregator. Everything's already consolidated.
- Audit your audio chain. If you were using a VST bridge for basic noise suppression, switch to Meld's built-in filters. If you need your VST3 plugins, load them directly.
- Replace StreamFX effects with Meld's native blur, color grade, and blend mode tools at your own pace.
The plugin stack that took hours to build in OBS becomes the default state in Meld. That's the actual value of the switch: not just fewer downloads, but a setup that doesn't require maintenance every time the underlying software updates.
Download Meld Studio and import your OBS setup to get started.