On this page
With Enhanced Broadcasting, you don't have to pick between quality and accessibility anymore. Viewers on fast connections get the full 1080p experience. Viewers on slower connections get a smooth stream that actually plays.
Twitch Enhanced Broadcasting in Meld Studio is easy to use. Let me walk you through everything you need to know to give your viewers the best possible experience, no matter what device they're watching on or how fast their internet is.
What Is Twitch's Enhanced Broadcasting?
Think of Enhanced Broadcasting as your stream's own personal assistant. Instead of sending just one version of your stream to Twitch and relying on the viewer to select the best resolution for them, your encoders create multiple versions at different quality levels and then Twitch automatically delivers the perfect quality to each viewer based on their device and internet connection. This guarantees every viewer receives the best viewing experience possible for them.
For Your Viewers
- ✓ No more buffering for people with slower internet
- ✓ Mobile viewers get a version optimized for their phones
- ✓ Desktop viewers with fast internet get the full HD experience
- ✓ Everyone can watch without fighting with the quality settings
For The Streamer
- ✓ More people can actually watch your stream (viewer retention for the win)
- ✓ No more obsessing over the "perfect" bitrate
- ✓ Your stream looks professional for everyone automatically
- ✓ Twitch handles all the technical stuff
In the past, Twitch's server-side transcoding (those quality options like 720p, 480p, 360p) weren't guaranteed for everyone. With Enhanced Broadcasting, you're creating those quality options yourself, so your viewers always have the best choice.
What You Need to Get Started
Before we dive into setup, let's make sure you've got what you need
Based on Twitch's guidelines, you'll want:
- • GPU: NVIDIA RTX 20 Series or newer (RTX 30/40 ideal)
- • Upload Speed: At least 12 Mbps
- • OS: Windows 10 or 11
- • Meld Studio: Make sure you're on the latest version
- • Twitch Account: You'll need to log into your Twitch account in your Meld output
Tip: Don't stress if you're not sure about your specs. When you enable Enhanced Broadcasting, Twitch analyzes your system and automatically configures settings that work for your hardware.
That's it! No special beta access required for basic Enhanced Broadcasting. (Though we'll talk about Dual Format streaming later, which does need beta access.)
Why Streamers Are Switching to Meld Studio
Tired of juggling plugins, fighting performance issues, and spending hours on setup? Meld Studio gives you everything you need in one powerful, intuitive package.
Stream Without Compromise
Fully optimized GPU acceleration means you can stream at max quality while gaming at max FPS.
Everything Integrated
Multi-platform chat in one window. Stream Deck controls out of the box. Virtual camera for Zoom or Discord. Stop switching between 10 different apps.
Professional Effects, Zero Plugins
Chroma key, color correction, drop shadows, and blur effects that actually work. No hunting for plugins, no compatibility nightmares, no crashes mid-stream.
Audio That Just Works
Twitch VOD track built in. Separate music from mic from game. Real-time monitoring and effects. Finally, audio mixing that makes sense.
One Setup, Two Formats
Stream landscape and portrait at the same time. Reach desktop viewers on Twitch while going viral on TikTok. No double work, no separate sessions.
Multistream Without Limitations
Stream to Twitch, YouTube, Kick, and Facebook simultaneously. Each output has independent settings. Grow everywhere without the hassle or monthly fees.
Ready to level up your stream? Join thousands of creators who've already made the switch. Download Meld Studio today and start streaming like a pro in minutes, not hours.
Download Meld Studio FreeSetting Up Enhanced Broadcasting in Meld Studio
Step 1: Connect Your Twitch Account
First things first, let's get Meld connected to your Twitch account.
- Open Meld Studio
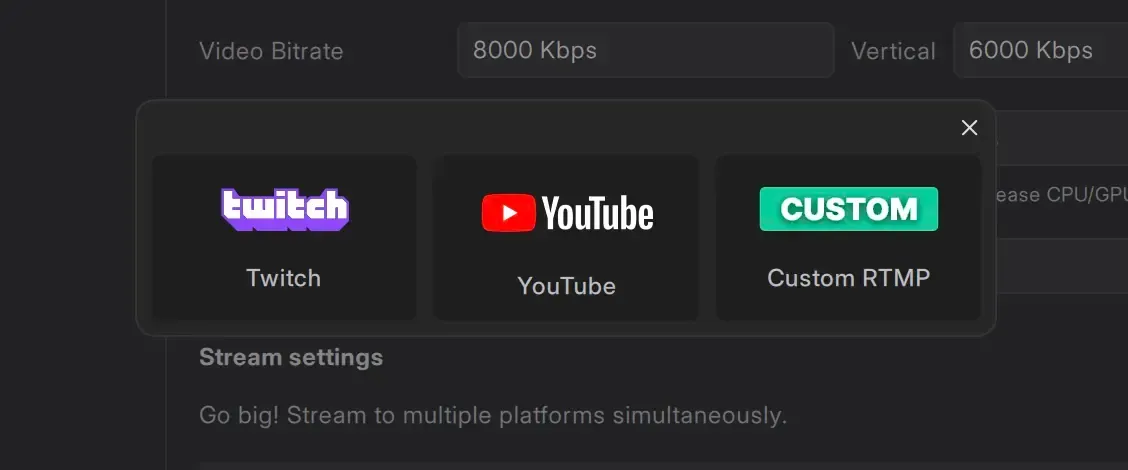
- Navigate to Settings > General > Streaming Outputs
- Click the + Add output button
- Select Twitch from the options
Now let's log in:
- In the Twitch Output Settings, click the Log In button
- Your web browser will open with Twitch's login page
- Enter your Twitch credentials
- Authorize Meld Studio to access your account (don't worry it only asks for basic permissions)
- You'll be redirected back to Meld, and your Twitch username will appear, confirming you're connected. Your stream server and stream key are now automatically configured!

Step 2: Enable Enhanced Broadcasting
- While still in your Twitch output settings, look for the Twitch Enhanced Broadcasting toggle
- Turn it ON
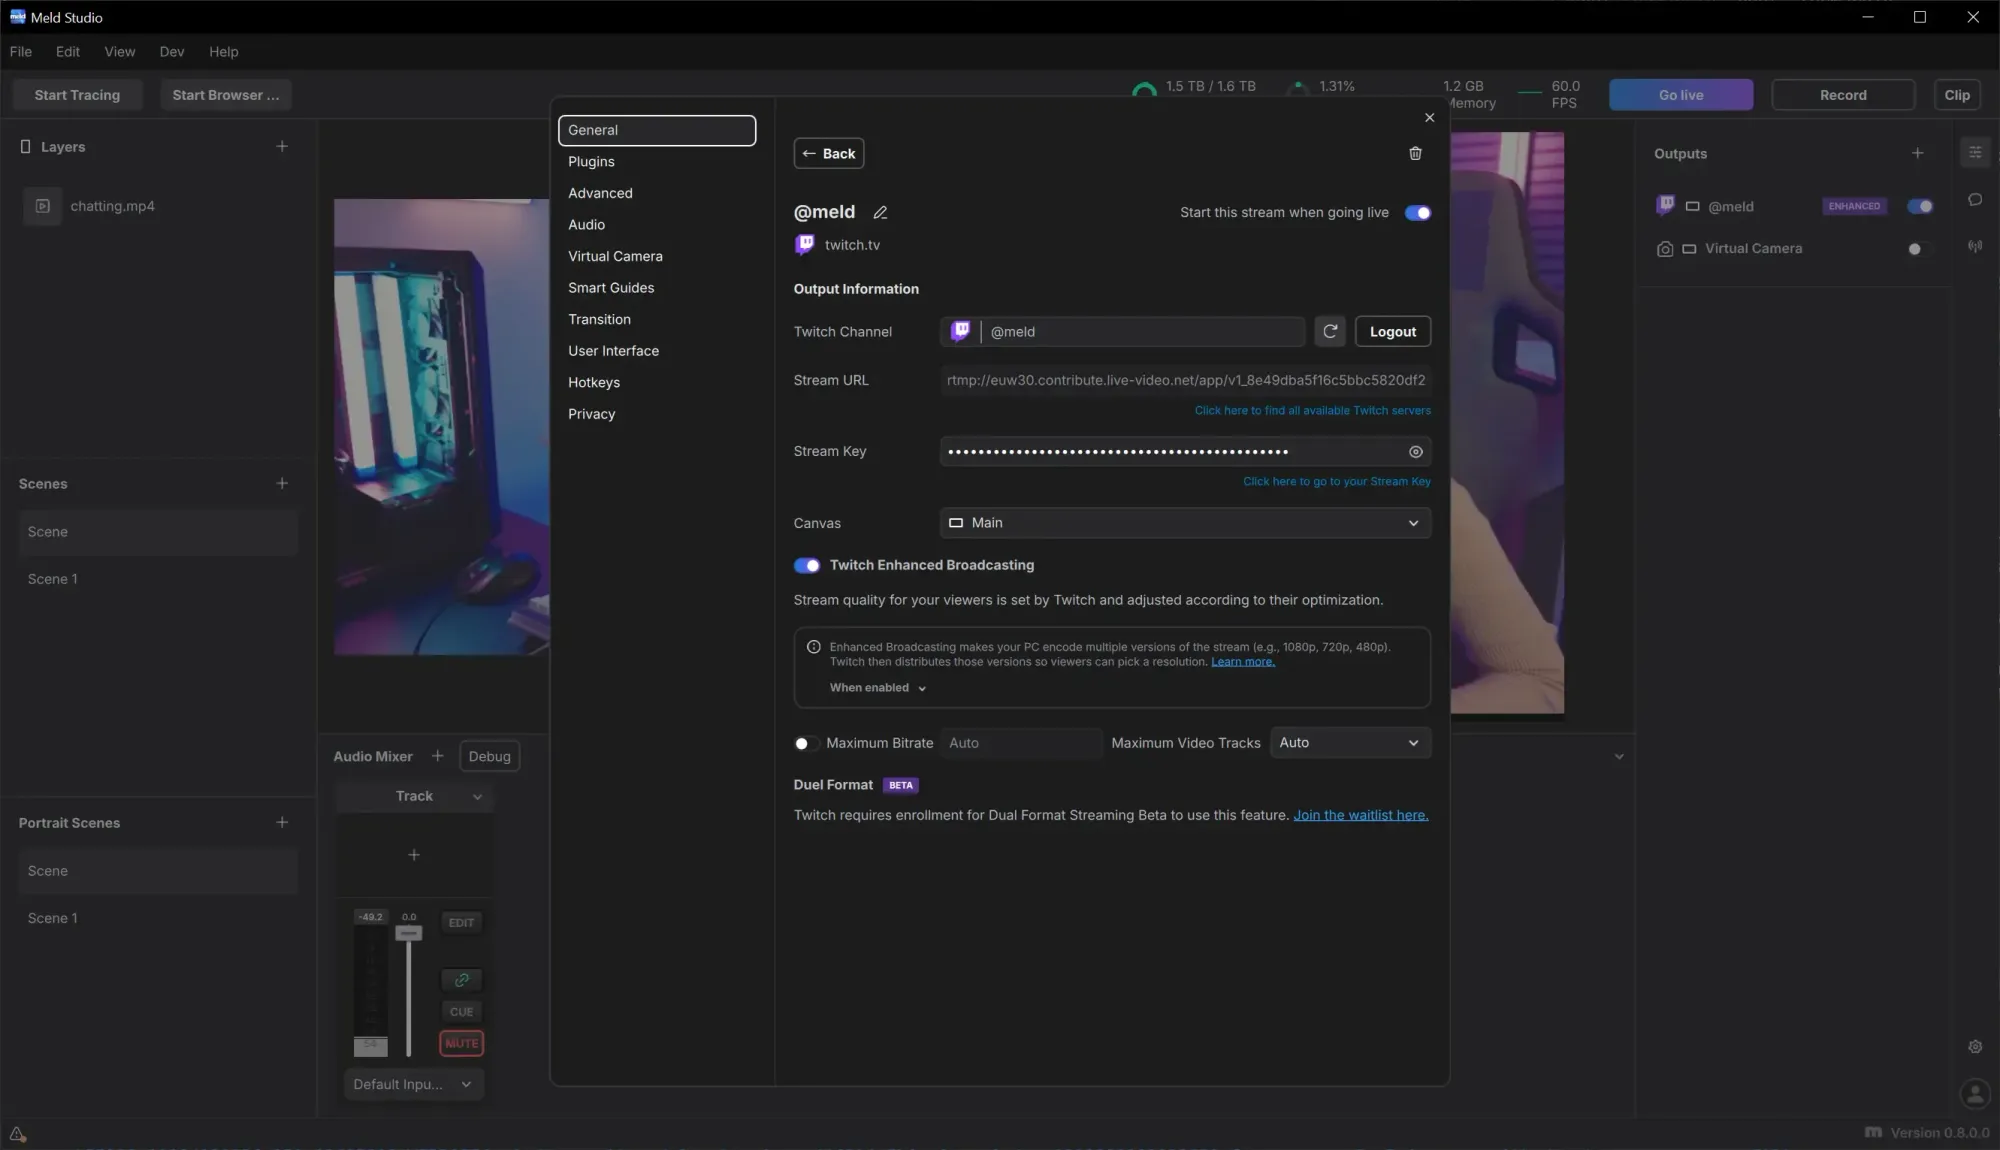
Step 3: Understand Your Settings
When you enable Enhanced Broadcasting, you'll see a couple of options:
Sets the total bandwidth cap for all your video tracks combined.
Auto means Twitch optimizes based on your system and connection.
Controls how many quality levels you send to viewers.
Auto means Twitch optimizes based on your system and connection.
Pro tip: Unless you're experiencing specific issues, leave both on Auto. Twitch's automatic configuration is really good at optimizing for your setup.
Step 4: Check the Encoder View
Want to see what's actually happening? Meld Studio has an amazing feature called Encoder View that shows you exactly what tracks your system is creating.
Access this by clicking View > Open Encoder View
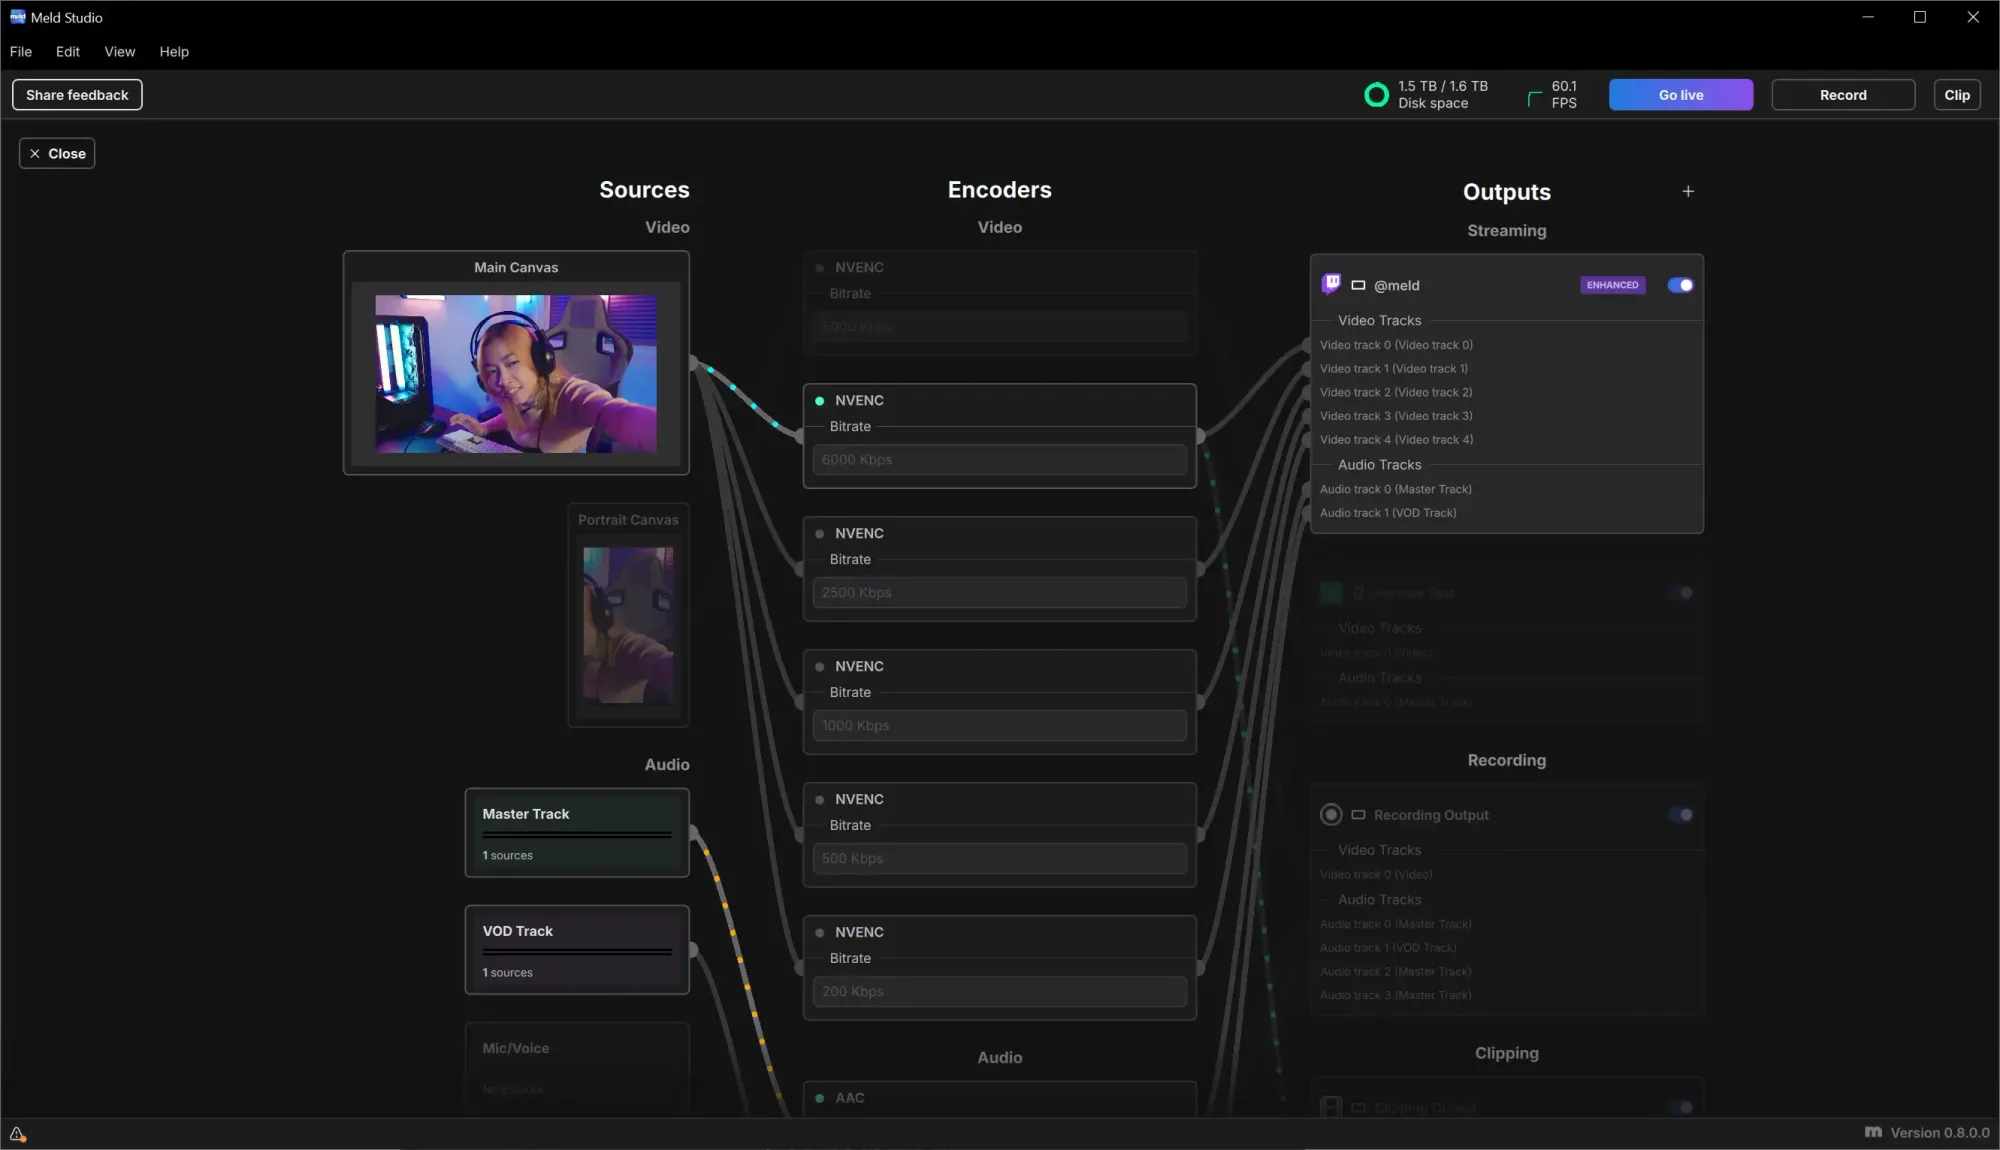
This view is just for information you don't need to configure anything here. But it's super satisfying to see your stream working at multiple quality levels simultaneously!
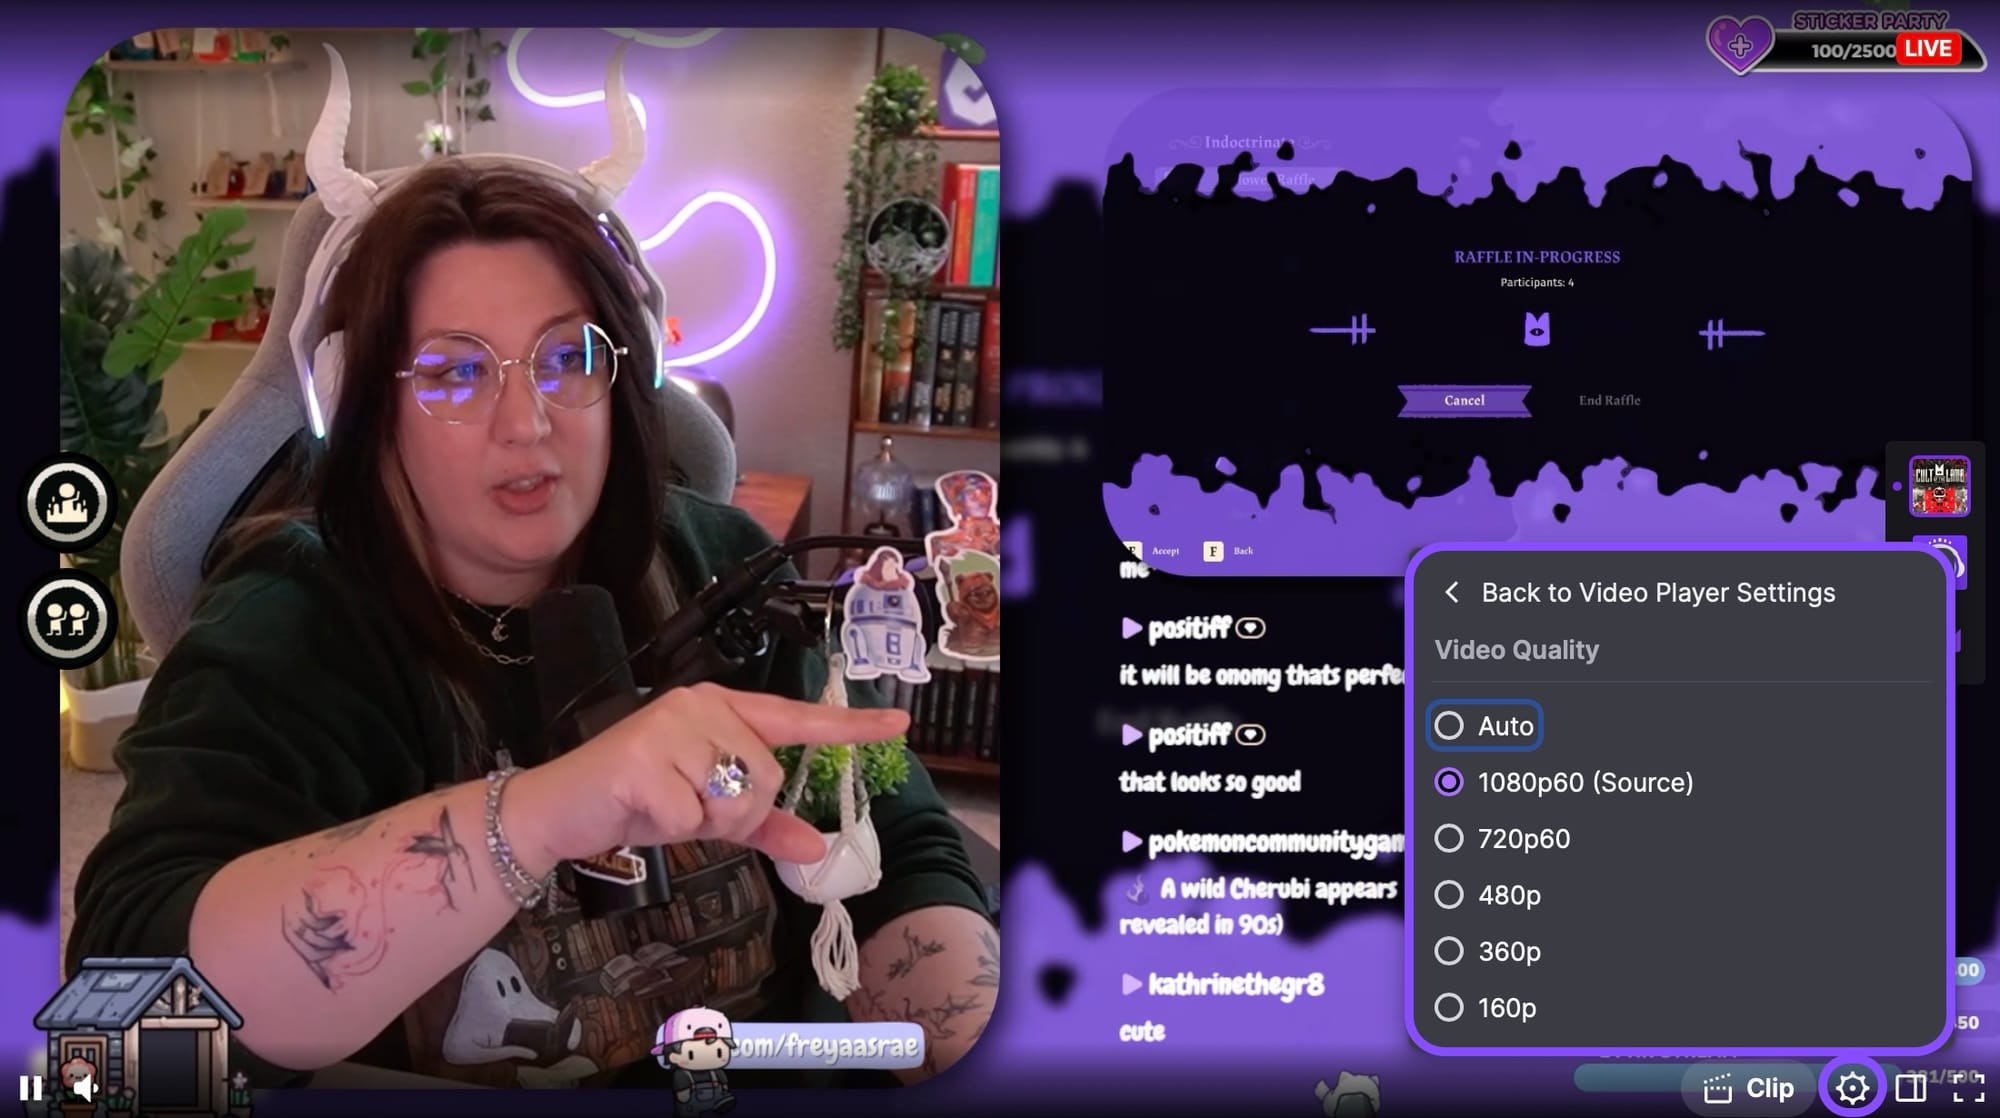
Step 5: Go Live and Test!
Click that Go Live button and start streaming as you normally would.
Pro Testing Tip: Open your stream on a different device yourself and check the settings gear. You should see multiple resolution options available!
Getting the Most Out of Enhanced Broadcasting
Okay, you're set up! Now let's talk about how to really optimize your experience.
Bitrate Strategy
Traditional Streaming: You might stream at 6000 kbps for 1080p60 Enhanced Broadcasting: Your total bitrate across all tracks might be 8000-12000 kbps (with the highest track around 6000-8000 kbps)
Why the difference? You're sending multiple quality levels, so the total bandwidth is higher. Each individual viewer only downloads ONE of those tracks, so they're not using more bandwidth than before.
Best Practice: Let Twitch's auto-configuration do its thing. It considers:
- Your upload speed
- Your GPU capabilities
- Your system resources
- Current network conditions
If you have solid internet (15+ Mbps upload), you're golden. If your upload is closer to 10-12 Mbps, Enhanced Broadcasting will still work but might create fewer tracks or lower quality levels to stay within your bandwidth.
Recording While Streaming
Here's an important heads-up about recording with Enhanced Broadcasting enabled:
Always start your stream BEFORE starting your recording.
Why? When you go live, Twitch reconfigures your encoder settings based on real-time conditions. If you start recording first, you'd either have to interrupt your recording when settings change, or your system might exceed Twitch's recommended limits.
- Go Live on Twitch
- Wait a few seconds for Enhanced Broadcasting to configure
- Start your recording
- Stream and record as normal!
Tip: Your recordings will automatically use the highest quality track that Twitch configured for your stream. That means you get great recording quality without having to set up separate recording settings!
Dual Format Streaming (Beta Feature)
Twitch's beta feature Dual Format Streaming lets you stream in both landscape (horizontal) AND portrait (vertical) formats simultaneously.
What Is Dual Format?
Imagine this scenario:
- Desktop viewers see your traditional horizontal stream
- Mobile viewers holding their phones vertically see a vertical stream optimized for portrait viewing
- When mobile viewers rotate their phone, they see the horizontal version
- One stream, two formats, automatic switching!
This is beneficial for mobile engagement. More and more people watch Twitch on their phones, and vertical content just feels better on mobile.
How to Access Dual Format
Dual Format is currently in beta, and Twitch controls who has access. You can apply for access to Dual Format stream here.
- Make sure you meet Twitch's requirements.
- Important: When filling out the form, select Meld Studio as your streaming software
- Submit and wait for Twitch's approval

Setting Up Dual Format in Meld
Once Twitch approves your account for the beta:
- Make sure Multi Canvas is enabled in Meld (this lets you work with both landscape and portrait layouts)
- No need to link portrait scenes to horizontal, every scene has both canvas's.
Enable by going to General > Multi Canavas
- Go to your Twitch output settings
- Enable Enhanced Broadcasting (Dual Format requires it)
- You'll now see a Dual Format canvas option
- Select it, and you're good to go!
If your account doesn't have access to the Dual Format Streaming beta, you'll see an error and the previous canvas option will be automatically selected. You can apply for access through Twitch here.
Best Practices for Dual Format
- Design Smart
- • Your horizontal layout can be your existing setup
- • Your vertical layout should be SIMPLE—phones have small screens!
- • Focus on your webcam and one main content element for vertical
- • Don't try to cram all your alerts and widgets into the vertical view
- Think Mobile-First for Vertical
- • Make your webcam 30-50% of the screen width (yes, really!)
- • Keep text large and readable
- • Put important elements in the center of the frame
- • Less is more—every element should serve a purpose
- Test Everything
- • Check both formats before you go live
- • Have someone view on mobile to verify the experience
- • Make sure both layouts look good independently
- Engagement Opportunity
- • Mobile viewers can subscribe, gift, and cheer in full-screen vertical mode
- • This makes monetization easier for mobile-first audiences
- • You're meeting viewers where they already are
Conclusion
This v.0.9.9.8 release represents our continued commitment to supporting diverse hardware configurations and giving creators the tools they need to stream and record efficiently. We're constantly working to optimize Meld Studio's performance across all platforms.
Ready to experience the difference? Download or update Meld Studio today
Join the conversation in our Discord or Reddit.
Troubleshooting Common Issues
My recordings aren't using my recording resolution!
This is expected behavior with Enhanced Broadcasting! Your recordings automatically follow the highest quality track that Twitch configured.
My GPU usage is really high!
Remember, you're encoding multiple video tracks now. This is normal! But if it's causing problems:
- Check that you're using hardware encoding (NVENC for NVIDIA)
- Try setting Maximum Video Tracks to a specific number instead of Auto
- Lower your game settings slightly to give your GPU more headroom
Some of my outputs are disabled!
If you have other outputs set up (like recording to a different canvas) and they become disabled when you turn on Enhanced Broadcasting, this is because Twitch is controlling which canvases can be used. Unless you're using Dual Format (which requires beta access), you can only stream one canvas at a time with Enhanced Broadcasting.
I don't see the Dual Format option!
The Dual Format option only appears if:
- Enhanced Broadcasting is enabled, AND
- Your Twitch account has been approved for the Dual Format beta
If you don't see it, you either need to request beta access from Twitch or wait for approval.
My stream quality seems inconsistent!
Enhanced Broadcasting adapts to your system and network in real-time. If you're seeing variations:
- Check your internet connection stability
- Make sure you're not maxing out your upload bandwidth with other apps
- Verify your GPU isn't being overwhelmed by other tasks