On this page
Are you dreaming of becoming the next big name on Twitch? Whether you're inspired by Kai Cenat’s rocketing rise or you just discovered the hype around Kai Cenat’s Streamer University, you're in the right place. This guide breaks down everything you need to know to get started with your streaming journey. From choosing the right gear to hitting "Go Live" with full confidence.
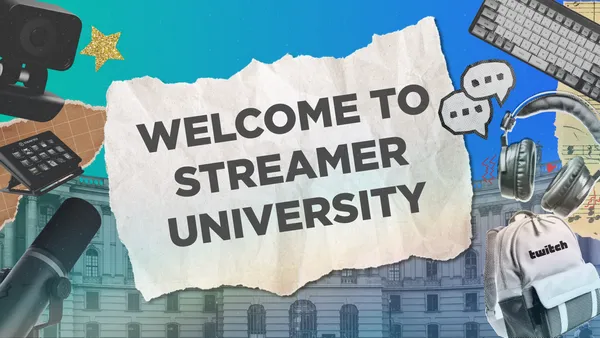
Welcome to Streamer University! Class is officially in session. ✏️
What Is Streamer University?
If you’ve been on Twitch or TikTok lately, chances are you’ve heard of Kai Cenat’s Streamer University. While it started as a parody during one of Kai’s iconic streams, it sparked real conversations around what it takes to become a successful streamer in today’s competitive content landscape.
Streamer University isn’t just an upcoming institution, but a mindset of ongoing education in the art of content creation, community building, and streaming strategy. Think of this guide as your crash course syllabus.
Step 1: Choose Your Platform (Spoiler: It's Probably Twitch)
Most aspiring creators start on Twitch, the world’s leading livestreaming platform for gaming and IRL content. Twitch gives you access to an audience, built-in features for discovery, and opportunities to start earning through its Affiliate and Partner programs.
While Twitch isn’t the only platform out there, it’s still the top choice for gaming and IRL streams thanks to its massive audience and streaming-first features. That said, don’t rely solely on one platform. Many creators also go live on YouTube, Kick, or TikTok Live. Take time to research where your content fits best and where your audience spends their time.
Step 2: Get the Right Gear
You don’t need Hollywood style production in order to start streaming, but there are a few essentials that will help you get started:
A decent mic
When it comes to streaming, audio quality matters more than video. Viewers can overlook a grainy webcam, but if your mic is crackling, full of background noise, or humming nonstop, they’re likely to tune out fast. Clean, clear sound keeps people listening. If your audio needs work, it’s worth the fix.
A webcam
If you plan to show your face on stream then a standard 1080p webcam will get the job done. Not every creator goes on camera though, so your setup depends entirely on your content style. VTubers, for example, often use webcams to power their rigs and track facial movements. On the other hand, PNGtubers skip the camera altogether and use static images that react to their voice instead. It's all about finding what fits your vibe.
Streaming software
If you guessed that we were going to recommend Meld Studio for your streaming software, you would be right! (It is our blog after all! 😏)
Choosing the right streaming software can make or break your content, and Meld Studio stands out as one of the most intuitive options on the market. Designed with creators in mind by actual creators, Meld Studio offers pro-level features without the steep learning curve or multiple plugins. We make it easy to manage your scenes, audio and multi-platform outputs all in one place.
With built-in support for vertical and horizontal canvases, high-quality screen recording, and seamless multi-streaming capabilities, Meld gives you everything you need to go live with confidence. Whether you're just starting out or leveling up your production, Meld Studio simplifies your workflow so you can focus on what matters most: content creation!
Lighting
Lighting can take your setup from flat and forgettable to more polished and professional. Even small changes such as tweaking the angle of the lighting can add depth and frame your face in a whole new, dare I say it, light.
If you're looking for lighting on a budget then consider investing in a basic ring light, as it can go a long way. You can also try bouncing your light off of a wall for a softer, more even lighting setup. You'll be pleasantly surprised by how much of a difference this can make!
Step 3: Design Your Stream Layout
Your layout for streaming is your very own digital stage and should reflect your style and personality. Alerts should be easy-to-read, overlays pleasing to the eye and separate scenes for different moments in stream, such as "Starting Soon", "BRB", or a close-up of your face when something dramatic happens.
Setting up your layouts in Meld Studio feels less like a chore and more like a creative flow. Using the drag-and-drop editor makes customizing scenes easy, and with just a few clicks, you can copy and paste your design across both horizontal and vertical canvases. This is perfect if you're wanting to stream to multiple platforms without doubling your workload. Want to stream in horizontal but clip your top moments in vertical so it's already formatted for social media posting? We've got you covered.
Step 4: Set Up Your Twitch Channel
Before you hit "Go Live" on Twitch, take a moment to make your channel look polished and professional.
Add a Profile Pic & Bio
Choose a profile picture that truly represents your branding. If you'll be on camera, a well-lit, professional-looking photo of yourself is a great choice. Don't forget that you are the face of your channel! If you're a VTuber or PNGtuber, consider using a model as your profile image to keep things consistent. You can also opt for a logo or custom mascot if that better fits your vibe. Whatever you choose, make sure it's clear, eye-catching, and true to your identity.
Your Twitch bio is a quick snapshot of who you are and what your stream is all about, so make it count! Keep it short, friendly, and informative. Let viewers know what kind of content you create, when you usually go live, and maybe throw in a fun fact or two to show off your personality. If you're part of any communities, charity campaigns, or stream teams, this is a great way to mention it.
Customize Your Offline Screen and Twitch Panels
When you're not live your channel should still be making an impression for anyone who stops by to take a look. Customize your offline screen with a branded image that includes information like your socials or your streaming schedule, that way visitors will know when to catch you live.
Twitch panels are another great way to share more information about yourself and your channel. Add sections for your bio, any tipping links, your community rules, frequently asked questions, and anything else your community might find helpful. A well-designed channel shows you care about your stream and helps viewers feel at home.
Link Your Social Media
It's been said over and over again, if you want to grow you have to diversify your content and your reach. Make it easy for viewers to stay connected by linking your social media accounts directly on your Twitch channel. Whether it's Twitter (X), Instagram, YouTube, or TikTok, adding your socials will help grow your community beyond just your livestreams while keeping everyone in the loop when you're not live. It's a small step that can have a big impact while building your brand.
Step 5: Press Go Live (But Make It Count)
Going live isn’t just about clicking a button. Be sure to plan out your content by asking yourself the following questions:
- Will you be playing a trending game?
- Are you doing a Q&A or community night?
- Do you have milestones or incentives for your viewers?
Even Kai Cenat’s wildest streams are planned to some degree. Scheduling content, hyping up the audience, and dropping surprises are part of what makes streams so watchable.
Bonus: Build Your Community Like Kai
The reason Kai Cenat broke Twitch records isn’t just because of his content, it’s also his community. Here’s how you can start building yours:
- Be consistent with your schedule
- Talk to your viewers like you would your friends
- Use social media (especially TikTok and X/Twitter) to promote your streams
- Collaborate with other streamers
Final Thoughts
Whether you're following in Kai Cenat's footsteps or blazing your own trail, getting started with livestreaming can be overwhelming, but it doesn’t have to be. Use this guide as your foundation, stay curious, and remember: the only way to grow is to hit that “Go Live” button and keep showing up.
We can’t wait to see what you create!
FAQ
Can I use this guide to stream on other platforms?
Yes! You can use these guidelines for setting up your channel on other platforms such as Kick, YouTube, Rumble, and more!
What is Streamer University?
Streamer University is a fun, community-driven term popularized by Kai Cenat to describe the journey of learning how to become a streamer. Kai decided to run with the idea and is making it a real event that streamers can enroll in.
Do I need expensive gear to become a good streamer?
Absolutely not! You can start streaming with a basic setup as long as you have decent audio and ideas for content.
Is Twitch the best platform for new streamers to start on?
Twitch is the most popular platform for gaming and IRL content. Streamers can succeed on other platforms like YouTube, Kick and TikTok as well. Choose the platform that best fits your audience and goals, or stream to all of them at once!
Can I stream to Twitch and TikTok at the same time?
Yes! With Meld Studio's multi-canvas support you can stream in both horizontal and vertical formats simultaneously. This is perfect for maximizing your reach without doubling your workload.
What makes Meld Studio good for new streamers?
Meld Studio offers an intuitive design that makes it easy and user-friendly. It's great for creators of all levels who want pro-level tools without the overwhelming need for plugins and third-party software. Everything is already built-in and ready to go!