On this page
Live streaming with a DSLR or mirrorless camera can dramatically improve your stream’s quality, offering superior image resolution, professional-grade video, and enhanced autofocus that traditional webcams can’t match. Whether you’re looking to elevate your Twitch stream, YouTube live stream, or gaming broadcasts, a DSLR or mirrorless camera is a game-changer. In this guide, we’ll show you exactly how to set up your DSLR or mirrorless camera for live streaming, covering everything from choosing the best camera for streaming to connecting it with Meld Studio for flawless broadcasts.
DSLR vs. Mirrorless Cameras
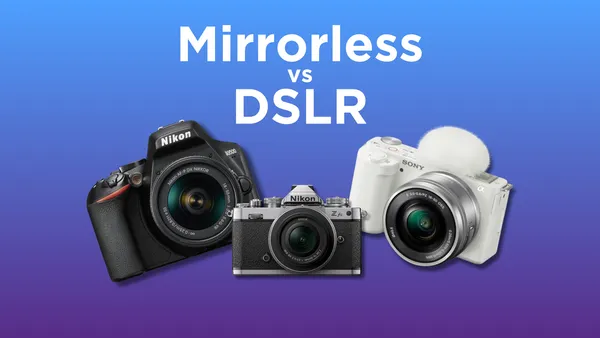
The main difference between DSLR (Digital Single-Lens Reflex) and mirrorless cameras lies in their internal mechanisms. DSLRs use a mirror to reflect light into an optical viewfinder, while mirrorless cameras pass light directly to the sensor without a mirror, offering a more compact design. This makes mirrorless cameras lighter and smaller, but DSLRs typically have better battery life since they don't rely on an electronic viewfinder. Additionally, mirrorless cameras excel in real-time focus adjustments through their electronic displays, while DSLRs can be faster for autofocus in traditional photography.
For live streaming, both types of cameras offer excellent video quality, but mirrorless cameras are often preferred for their superior autofocus in video mode and real-time feedback via electronic viewfinders or LCD screens. However, DSLRs tend to have longer battery life, which is useful for longer streams. The decision between the two comes down to personal preference—if you value portability and advanced video features, a mirrorless camera is a great choice. If you prefer a traditional camera feel with longer battery life, a DSLR might be better suited for you.
Quick Comparison of DSLR and Mirrorless Cameras for Live Streaming
| Feature | DSLR | Mirrorless Camera |
|---|---|---|
| Image Quality | High-quality photos & videos | Excellent image quality, often better than DSLRs |
| Portability | Bulky and heavier | Compact and lightweight |
| Autofocus | Fast in photography, slower in video | Fast and accurate, ideal for video |
| Battery Life | Long battery life | Shorter battery life, may need constant power |
| Lens Options | Wide variety of lenses | Limited lens selection but growing |
| Ease of Setup | Requires capture card, cables, & tripod | Requires capture card, cables, & tripod |
| Real-Time Preview | Optical viewfinder, no preview on screen | Electronic viewfinder, or LCD screen preview |
| Cost | High cost for camera & accessories | Moderate to high cost for camera & lenses |
| Camera Control | Manual control over settings | Manual and automatic control available |
| Popular for | Professional streams, high-quality content | Streamers looking for professional video & portability |
Why Choose a DSLR or Mirrorless Camera for High-Quality Live Streaming?
Traditional webcams get the job done, but DSLR and mirrorless cameras can provide a sharp, cinematic look with stunning depth of field, vibrant colors, and crisp detail. Whether you're streaming gameplay, a podcast, or a creative project, using a DSLR or mirrorless camera will make your stream look more polished and professional.
Step-by-Step Guide to Setting Up Your Digital Camera for Live Streaming
But how do you take your camera from the shelf to your streaming setup? Let’s walk through the process.
Step 1: Gather Your Gear
Before diving into the technical setup, make sure you have the following equipment:
- Camera: A DSLR or mirrorless camera, such as the Canon EOS series, Sony Alpha series, or Nikon mirrorless options.
- Lens: A 50mm lens is great for portrait-style shots, while a wider lens (e.g., 24mm) is ideal for a broader field of view.
- Capture Card: A capture card is essential to connect your camera to your computer. We recommend popular models like Elgato Cam Link or budget-friendly alternatives.
- Cables: HDMI cables are needed to connect the camera to the capture card. Some cameras might also require a USB connection for live streaming.
- Power Supply: DSLR and mirrorless cameras are designed to last only a few hours on battery, so invest in a dummy battery or a constant power adapter for uninterrupted streaming.
- Tripod or Mount: Ensure your camera is stable and positioned at the right angle with a sturdy tripod or mount.
- Microphone: Even though your camera has a built-in mic, using an external microphone will significantly improve audio quality, which is key for engaging streams.
Step 2: Set Up Your Camera
Now that you have all your gear, it's time to set up your camera for optimal performance during your stream.
- Camera Positioning: The first step is determining where to place your camera. A good rule of thumb is to keep the camera at eye level for a flattering angle, and place it on a tripod or mount to ensure stability.
- Camera Settings: To get the best possible stream, you’ll want to configure the camera settings:
- Resolution and Frame Rate: For streaming, 1080p at 60fps is the standard. This ensures your stream looks smooth and sharp.
- Focus: Set your camera to manual focus to avoid any autofocus distractions during your stream.
- Exposure & White Balance: Manual settings are key to ensuring consistency. Adjust the exposure to match your lighting, and set the white balance to avoid color shifts.
- Disable Auto Sleep Mode: Many cameras will automatically turn off after a set period. Make sure you disable this feature to prevent your stream from cutting out mid-session.
Step 3: Connect Your Camera to Your Computer
To use your DSLR or mirrorless camera for streaming, you need to connect it to your computer through a capture card.
- Install the Capture Card: Insert the capture card into your computer’s USB port. Ensure your camera and capture card are compatible.
- Connect the Camera to the Capture Card: Use an HDMI cable to connect the camera’s HDMI output to the capture card’s input port.
- Power Up Your Camera: Make sure your camera is turned on and set to video mode.
Step 4: Configure Meld Studio for Streaming
Now that your camera is connected, it’s time to configure Meld Studio to capture your camera feed.
- Open Meld Studio: Launch Meld Studio and create a new project or open your existing stream setup.
- Add Camera Source: In the source settings, click on the "+" button to add a new video source. Select your capture card from the available devices.
- Adjust Settings: Ensure your video settings (resolution, frame rate) match the settings on your camera for seamless integration.
- Test the Feed: Make sure the video feed looks good in the preview window. Check the color balance, focus, and framing. If necessary, tweak your camera settings to get the perfect shot.
Step 5: Optimize Your Stream
To ensure your stream looks and sounds great, consider these final touches:
- Lighting: Proper lighting is essential for a crisp, clear image. Consider using softboxes or ring lights to brighten your face and reduce shadows.
- Enhance Video Quality with Built-In Camera Effects: Unlock your DSLR or mirrorless camera's potential by leveraging Meld Studio's built-in effects and color profiles to achieve professional-grade results without additional add-ons or plugins giving you limitless possibilities.
- Audio: Use a high-quality external microphone (like a USB or XLR mic) to capture crystal-clear sound. Sync your audio and video to avoid delays.
- Background: A clutter-free or visually appealing background can make a big difference. Consider adding subtle decorations or stream overlays to enhance your aesthetic.
- Test Before Going Live: Always run a test stream before your live session to ensure everything is working smoothly. This is the time to fix any technical issues, from lighting adjustments to sound synchronization.
Step 6: Go Live with Meld Studio!
Once your camera is set up and everything is working smoothly, it’s time to go live!
With the powerful integration of Meld Studio, you can easily manage your video, overlays, and stream settings to provide an immersive and professional streaming experience.
Don’t forget to keep experimenting with different camera angles and settings to find what works best for your unique style. Your DSLR or mirrorless camera is now ready to deliver top-tier quality to your audience.
Troubleshooting Tips
Here are a few common issues you may encounter and how to fix them:
- Camera not recognized: Ensure your capture card is installed correctly and compatible with your camera.
- Overheating: Some cameras may overheat during extended streaming sessions. Using a dummy battery or investing in a cooling fan can help.
- Audio/Video Sync Issues: Check the settings in Meld Studio and ensure your audio and video are synchronized properly.
FAQ
Can I use a DSLR or mirrorless camera for live streaming?
Yes, you can! DSLR and mirrorless cameras provide higher image quality compared to traditional webcams. By connecting your camera to a capture card, you can use it as a webcam for streaming on platforms like Twitch, YouTube, and Facebook Live.
What equipment do I need to set up my DSLR or mirrorless camera for streaming?
You’ll need:
- A DSLR or mirrorless camera
- A lens (50mm for portraits or wide-angle for more coverage)
- A capture card (such as Elgato Cam Link)
- HDMI cables to connect the camera to the capture card
- A tripod or camera mount
- Power supply (dummy battery or AC adapter)
- External microphone (for better sound quality)
What is a capture card, and why do I need it?
A capture card is a device that allows you to connect your DSLR or mirrorless camera to your computer via HDMI. It converts the camera’s video output into a format that your streaming software (like OBS or Meld Studio) can recognize and display on your stream.
Do I need a special lens for live streaming?
While you don’t need a special lens, certain lenses can improve the quality of your stream. A 50mm lens with a wide aperture (like f/1.8) is popular for its shallow depth of field, giving a nice blurry background (bokeh). A wide-angle lens (24mm or 35mm) is good for capturing more of your surroundings.
How do I prevent my camera from overheating during long streams?
To prevent overheating, you can use a dummy battery or AC power adapter to keep the camera powered without relying on internal batteries. Additionally, you might want to invest in a camera cooling fan if your camera tends to overheat during long sessions.
Can I use my DSLR or mirrorless camera without a capture card?
While most DSLRs and mirrorless cameras require a capture card for live streaming, some newer models offer USB streaming capabilities. However, using a capture card is generally the most reliable way to get high-quality video from your camera to your computer.
What settings should I adjust on my DSLR or mirrorless camera for live streaming?
Adjust the following settings for optimal streaming:
- Resolution: Set to 1080p at 60fps for smooth video quality.
- Focus: Use manual focus to avoid autofocus shifts during streaming.
- White Balance: Set manually to ensure consistent color accuracy.
- Exposure: Adjust to match your lighting conditions.
- Disable Auto-Sleep: Turn off any auto-off settings to prevent the camera from shutting down mid-stream.
How do I add my camera feed to my streaming software?
In your streaming software (such as OBS or Meld Studio):
- Open the software and create a new scene.
- Click "Add Source" and select "Video Capture Device."
- Choose your capture card from the list of available devices.
- Adjust settings such as resolution and frame rate to match your camera’s settings.
- Test your feed to make sure it’s working correctly.
What are the best cameras for live streaming?
Popular models for live streaming include:
- Canon EOS M50 (Mirrorless)
- Sony A6400 (DSLR)
- Sony Alpha a6000/a6400 (Mirrorless)
- Canon EOS Rebel T7i (DSLR)
- Sony Alpha a7 III (Full-frame Mirrorless)
These cameras are well-regarded for their video quality, autofocus capabilities, and ease of use.
Conclusion
Setting up a DSLR or mirrorless camera for live streaming can be a bit technical, but the results are well worth the effort. With better image quality, more flexibility, and a professional look, your streams will stand out from the crowd. By following these steps, you can unlock the full potential of your camera and create an engaging, high-quality streaming experience for your viewers.


