On this page
We're beyond excited to welcome you to Meld Studio, your new creative home for livestreaming, recording, podcasting and content creation! Whether you're just getting started as a content creator or you're a seasoned pro, Meld Studio is crafted to simplify your workflow and boost your production quality on any device.
Diving in is Easier Than You Think!
Starting with a new streaming tool can feel a bit overwhelming, but we've got you covered! We've designed every feature to be intuitive, approachable, and more importantly, fun! Here’s how you can hit the ground running with Meld Studio:
Your First Steps 🚀
Starting with a new streaming tool can feel overwhelming, but we’ve designed every feature to be intuitive, approachable, and most importantly, fun! Here’s how to hit the ground running:
Download & Install
Head over to the Meld Studio website and grab the Windows or macOS installer, and follow the on-screen prompts to complete the setup. By default, Meld installs to your system's C: drive so it can store your settings and layouts. Be sure to leave it there for smooth, trouble-free performance. Meld will automatically update to keep you on the latest release without having to deal with manual downloads. Upon your first launch of Meld Studio you will be greeted with a fresh workspace, ready for you to start creating as you build out your scenes and layers.
Launch Meld Studio
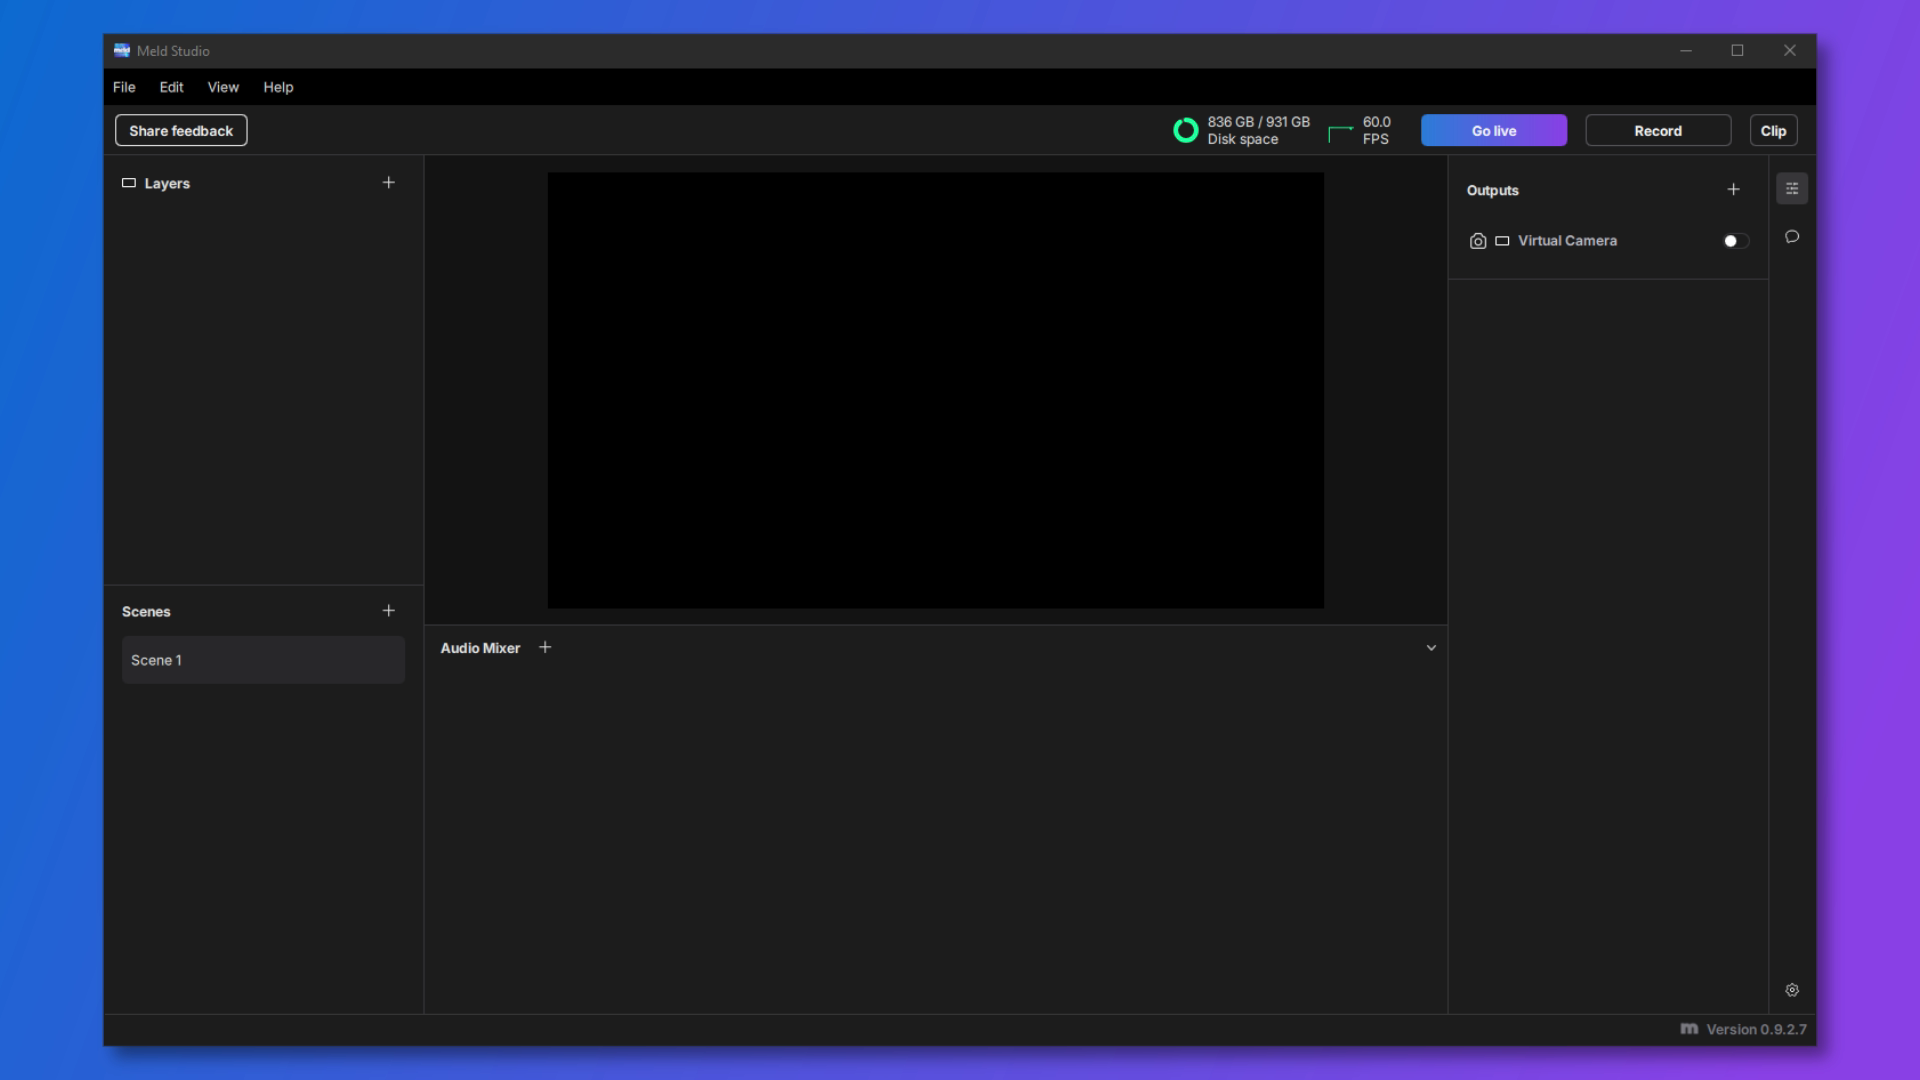
Upon your first time launching Meld Studio you will be met with a pop-up window telling you a little about what you can do to customize the software. The three sections of Meld are as follows:
- Scenes & Layers (Left): This section will be the building blocks of your setup. Add, rename, and reorder your scenes.
- Canvas & Audio Panel (Center): See exactly what your viewers are going to see and hear with the Canvas and Audio panels in the center of Meld. Any changes you make will be seen and heard in real time for streams and recordings.
- Inspector Panel (Right): Tweak sizes, flip sources, and browse effects for full creative control. Is the right side empty? Select a layer in your scene and it will give you all the options available for that layer. You can swap between the Inspector Panel and integrated multi chat by clicking the little 💬 icon and setup a chat dock or use the native Twitch and YouTube multi chat.
Did you know we have a YouTube channel where you can find more tutorials?
OBS Importer Tool
If you're coming over from OBS and you want to transfer your setup directly into Meld then you can use our OBS Importer Tool. Simply go to File and select Import OBS Session. Meld Studio will find your OBS files and transfer them over without any more work from you, making it easy and a great time-saver! Some files may not be compatible with Meld Studio so be sure to go through all of the layers and ensure everything transferred over properly.
Set Up Your Scenes and Layers
Click the "+" icon next to Scenes and then right-click the scene and select Rename so that you can give it a name. You can begin adding layers AKA 'sources' for those coming over from OBS. With the drag-and-drop tool you can select files, images, widgets or whatever else you may have on your computer, and drag them directly into the canvas. That will create the layer without having to go through the hassle of a pop-up window and searching for the item.
Setup Your Audio
Getting your audio right is crucial for a professional stream. When everything sounds perfect you’re ready to hit Go Live with confidence!
Global vs Per Scene Audio
Audio management is both powerful and flexible in Meld Studio. You can link your audio tracks to be global, meaning any adjustments you make will carry across every scene for consistency. But when you need scene-specific mixes you can unlink, like keeping your microphone muted on Starting Soon and BRB scenes. This per-scene audio feature makes it so you have control over your viewers' experience without having to juggle multiple audio buses or external mixers during your livestreams.
Hear Your Alerts
Check your audio levels in real-time with Meld Studio's built-in CUE button, so you can hear exactly what your viewers hear when an alert goes off. Simply click CUE in the audio mixer, and you'll instantly hear your alert sounds, notifications, and any other audio you choose in your headphones.
Audio Effects
Meld Studio offers some audio effects that you can use so that your audience gets the best audio experience possible!
If you're needing more assistance with audio, the Meld Studio team have cultivated a great community on Discord where you can get support from users and the team!
Built-In Effects
With an extensive collection of effects built right into the software, customization is just a click away! These native effects are inspired by industry-standard production tools, such as color correction, compositing, blurs and stylization. You can apply any effects to your layers without having to install plugins or add-ons. The effects panel lets you browse and customize each effect.
Make It Yours
One of the greatest features of Meld Studio is that you can personalize your content how you'd like natively! No plugins required for creativity and we're here to show you a couple of ways you can find inspiration to make your content fit your brand directly in Meld.
Single Canvas vs Multi Canvas
You can choose between the Main Canvas, which is a single canvas that's great for traditional streaming or recording if you're only looking for one canvas size. One canvas means one layout.
With the Multi Canvas feature you can stream in both horizontal and vertical formats simultaneously! This is a great if you're trying to diversify your content and reach an audience on different platforms. For instance, you can stream in 16:9 aspect ratio for horizontal to Twitch, YouTube, Kick, or any other streaming platform while also streaming in 9:16 for vertical canvas to TikTok, YouTube Shorts and Instagram Reels. Unsure about video resolution and aspect ratios? You can learn more about them here.
Enable and/or Disable the Clipping Tool
You can clip parts of your stream, recording, or even without actually pressing 'record' with the built-in Clip Button. To enable or disable the clipping feature head to File > Preferences and under the General tab you will see Clip Output where you can select to edit the settings of clipping. Once you select edit you will see a toggle to enable/disable the clipping feature along with these other settings:
- Clip Length: You can choose how long you want your clip lengths to be. The times are 10, 30, 60, 90 and 120 seconds.
- Local destination: Choose where you would like your Clips to save.
- File Format: You may select a different file format for your clips to be saved in, such as mov, mkv, and flv.
- Canvas: Select whether you want to grab clips from your Main Canvas or Vertical Canvas.
Because Meld Studio records clips natively at your chosen stream settings, you avoid the compression you would get by downloading clips and Twitch VODs. This means your highlights stay crystal-clear whether you're posting them to social media platforms. Best of all, it keeps everything organized right within your designated file, so you know exactly where to find them.
Widgets in Meld Studio
Finding the perfect on-screen flair for your streams is a breeze with Meld Studio's built-in widgets library on our website. You can drag-and-drop widgets directly from the website into your studio and customize it to your liking without fiddling with imports or plugins. Each widget lives as its own layer within your scenes making them easy to lock, hide, or tweak from the Inspector Panel. Whether you're adding confetti to burst and celebrate a milestone or the spotlight widget to highlight your most recent user activities, Meld's intuitive widget workflow keeps you focused on creating, not wrestling with files and long-winded guides.
Get Inspired to Create Content
Meld Studio is built for creators, by creators, which means every feature is designed with your success in mind. Here’s what you can look forward to:
- Powerful Customization: Make your broadcasts uniquely yours with extensive customization options. Adjust transitions, animations, alerts, and overlays to perfectly match your brand’s style.
- Performance That Impresses: Enjoy smooth, stable performance optimized for both Windows and macOS, including full optimization for Apple Silicon. Meld Studio ensures your stream stays silky-smooth, so you can focus on engaging your viewers.
- Built for Growth: With powerful analytics and built-in tools to help you grow, Meld Studio provides the insights you need to boost engagement and take your content to the next level.
Before You Go Live
Before you hit Go Live for the first time, make sure your entire setup is rock-solid. Test your camera and microphone to confirm they are giving crisp video and clear audio. Adjust your lighting to eliminate harsh shadows and check out the following:
Use the Encoder View
The Encoder View in Meld gives you a real-time window into exactly how your stream is being processed under the hood. To open it, go to View > Open Encoder View and you'll see your current video and audio bitrates, frame rates, and encoder type. This is a very useful tool that helps you see a visual representation of what outputs your audio and visuals are being directed to. This helps you always know exactly what's happening with your stream and how to optimize it.
Check Your Internet Connection
Before you tinker too much with your encoding settings, it's a good idea to make sure that your network can handle your desired bitrate and is strong enough to stream. If you're seeing frequent dips or spikes, it's a sign your connection is unstable. Run a quick speed test to confirm your upload bandwidth meets or exceeds your streaming settings. If your results fall short, try switching from Wi-Fi to a wired ethernet connection, close any bandwidth-hungry apps such as cloud backups or large downloads, or contact your ISP about a plan upgrade. A solid, consistent connection means fewer dropped frames and smoother streams.
Create Your Best Content Yet
Meld Studio is built for creators, by creators, which means every feature is designed with your success in mind. Here’s what you can look forward to:
- Powerful Customization: Make your broadcasts uniquely yours with extensive customization options. Adjust transitions, animations, alerts, and overlays to perfectly match your brand’s style.
- Performance That Impresses: Enjoy smooth, stable performance optimized for both Windows and macOS, including full optimization for Apple Silicon. Meld Studio ensures your stream stays silky-smooth, so you can focus on engaging your viewers.
- Built for Growth: With powerful analytics and built-in tools to help you grow, Meld Studio provides the insights you need to boost engagement and take your content to the next level.
Join the Meld Community!
Meld Studio isn’t just software, it’s a supportive community of creators ready to help you thrive. Share tips, celebrate wins, ask questions, and find inspiration among a vibrant group of streamers and creators just like you.
Stuck? We've Got Your Back!
Questions or hiccups along the way? Our friendly support team is always here to help. Reach out anytime through our support channels or join community forums for quick and helpful solutions. We'll even jump into a Discord call and walk you through setup while you screen share.
Let’s Create Something Incredible Together
We're thrilled you're here, and we can't wait to see all the incredible content you'll create with Meld Studio. Welcome aboard, and let's make some amazing things happen!
Happy creating!
— Your friends at Meld Studio